
Extend the capabilities of your CRM by connecting UniTalk IP telephony.
One of the keys to successful sales is meeting clients needs and the use of IP telephony allows you to establish communication with them and thereby improve the level of service.
Features of work
At Uspacy, telephony works through integrations with specialized services. In the Marketplace section there are free applications that, once installed and configured, will allow you to call or receive calls from clients.

💡 Payment for telephony services is made on the service side.
You can get to know more about the plans and prices of UniTalk at this link
For the successful work of Unitalk telephony, it is necessary to configure initial settings both at telephony and Uspacy. After that, install a special extension for Google Chrome to make and receive incoming and outgoing calls on any browser pages, including your Uspacy Space.
About everything below ⬇️
UniTalk settings
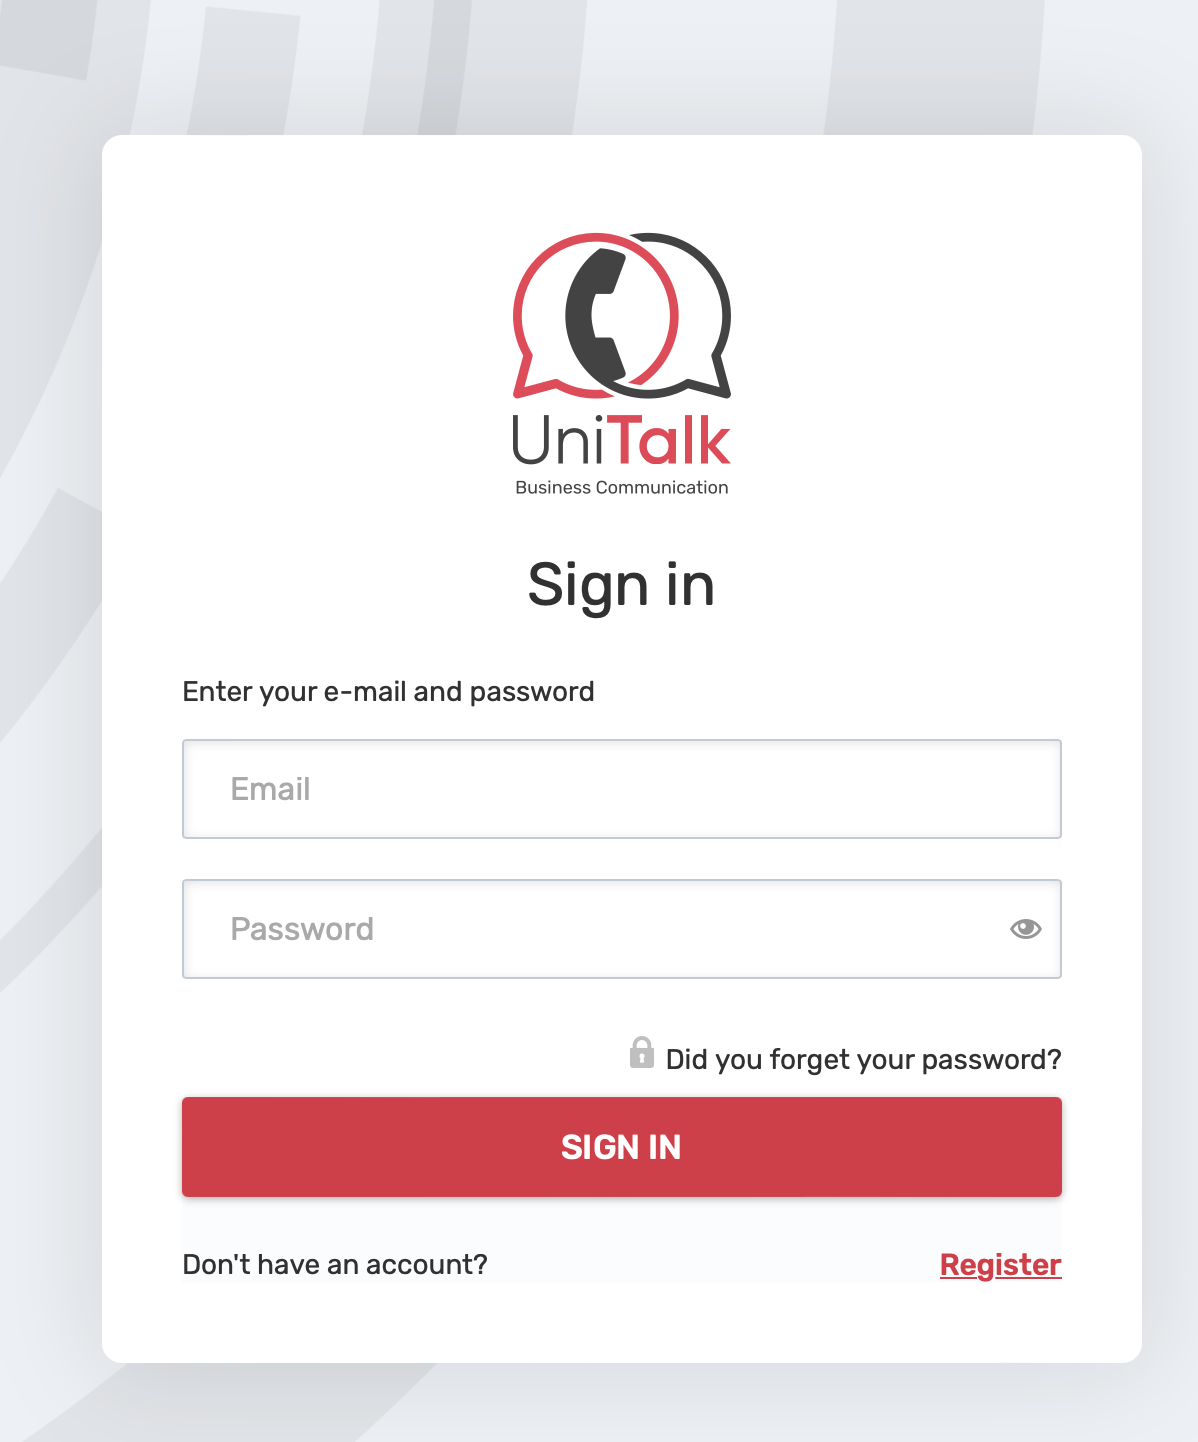
Step 1. Sign up or log in
Step 1. Sign up or log in
The first thing you need to do is to sign up in the service.
🔍 You can read more about how to create a personal UniTalk account in the following article.
The service has its own knowledge base, where you can find more information about working with it.
Follow this link to get to know more ➡️ HERE
If you already have a UniTalk account, simply log in using your username and password.
Step 2. Api key
Step 2. Api key
You first need to generate an API key. To do this, go to the Integrations - API section (you can access it only if you are the owner or an administrator of your Unitalk project).
Click the Generate API Key button.
After that, it will appear in a special field.

This key is needed for the next step.
Step 3. Outgoing webhooks
Step 3. Outgoing webhooks
Next, you need to configure the handling of the two outgoing webhooks. This will ensure that call information in the Unitalk system is transferred to Uspacy.
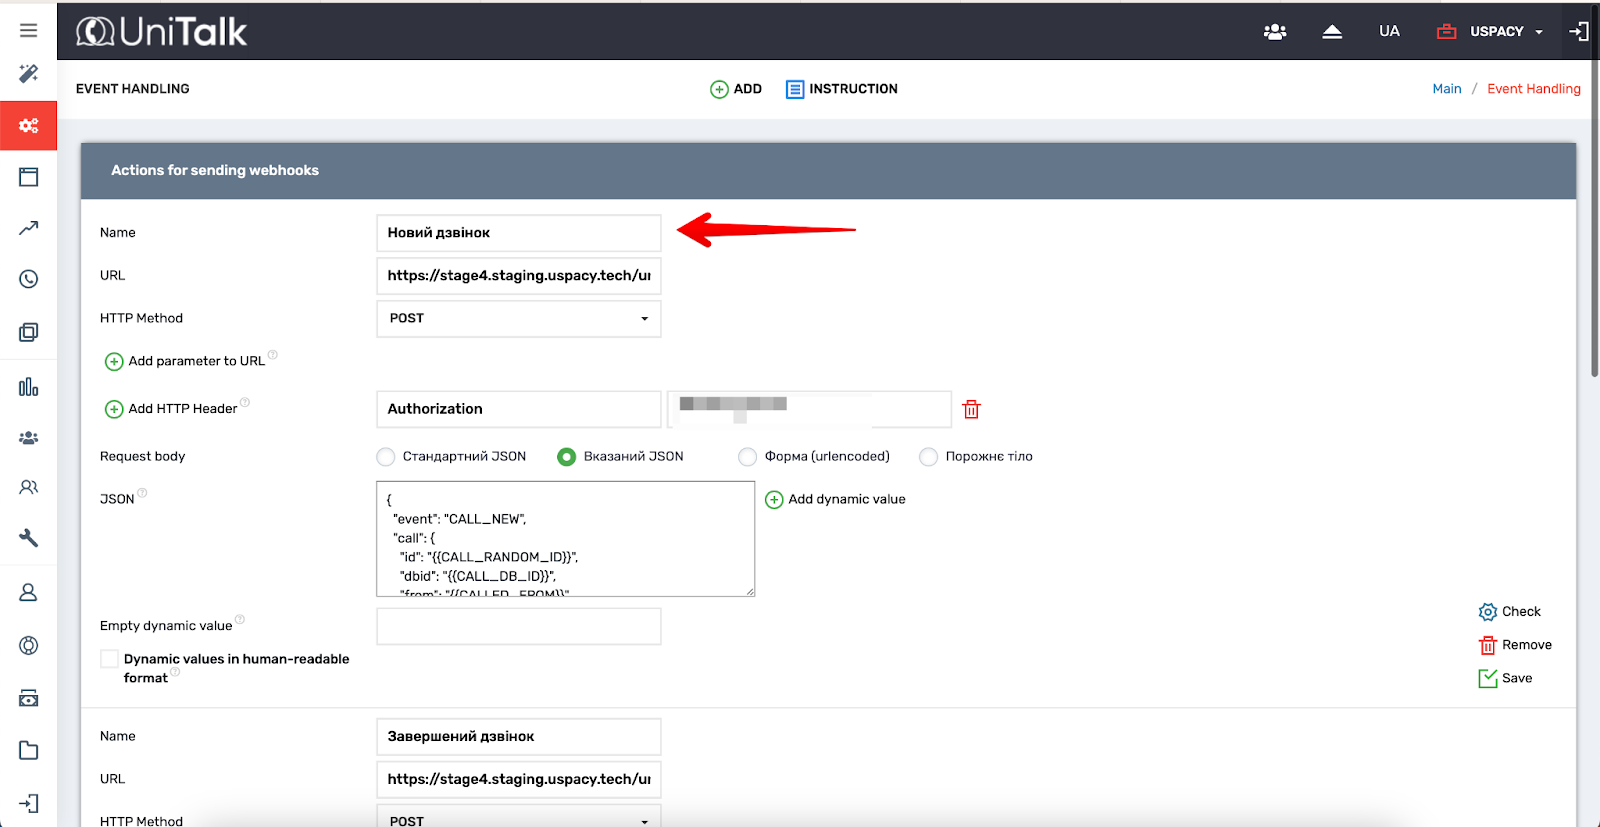
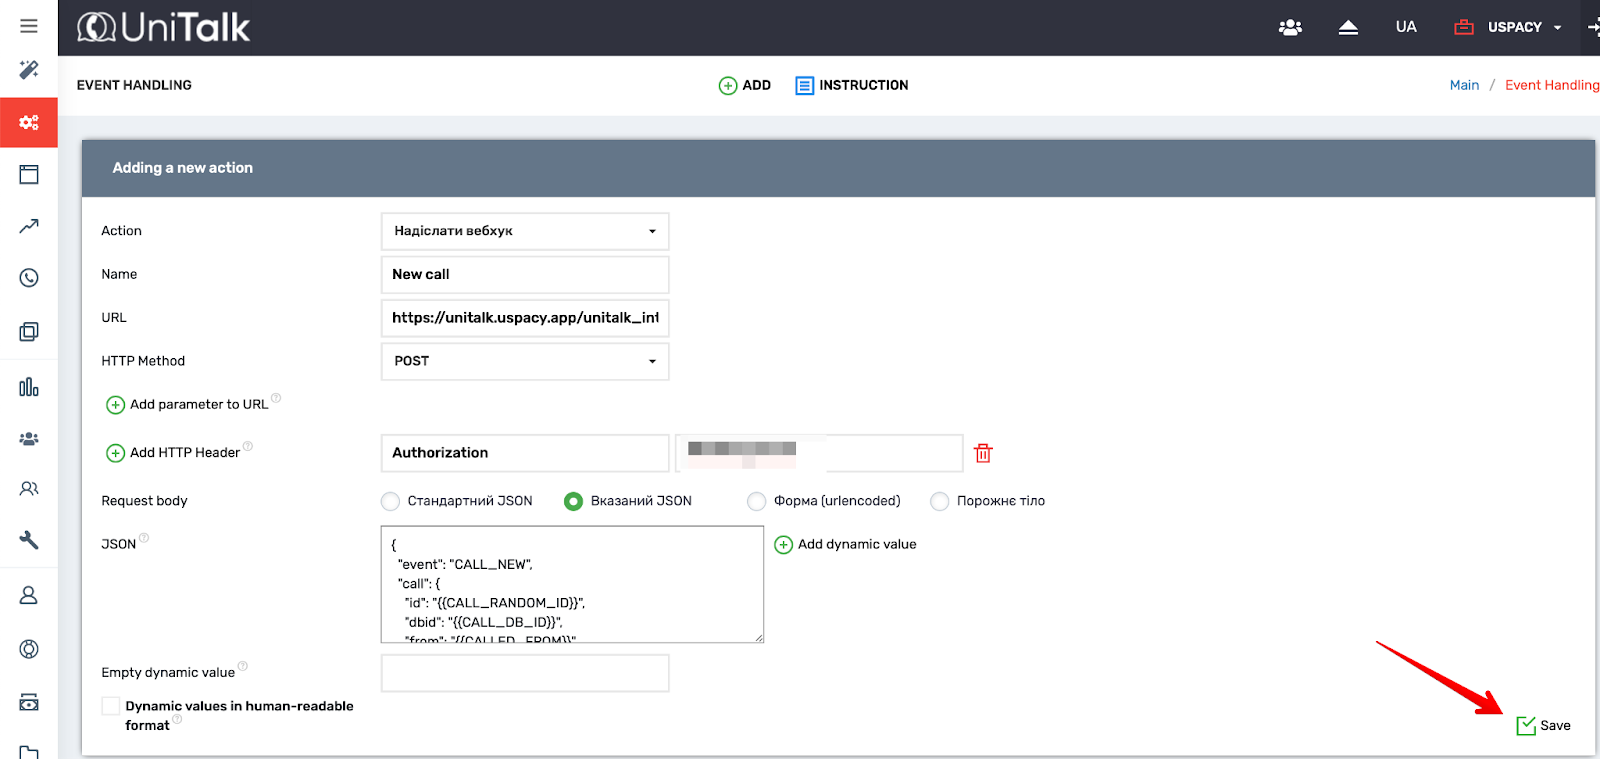
New call
Click Add webhook and fill out the creation form.
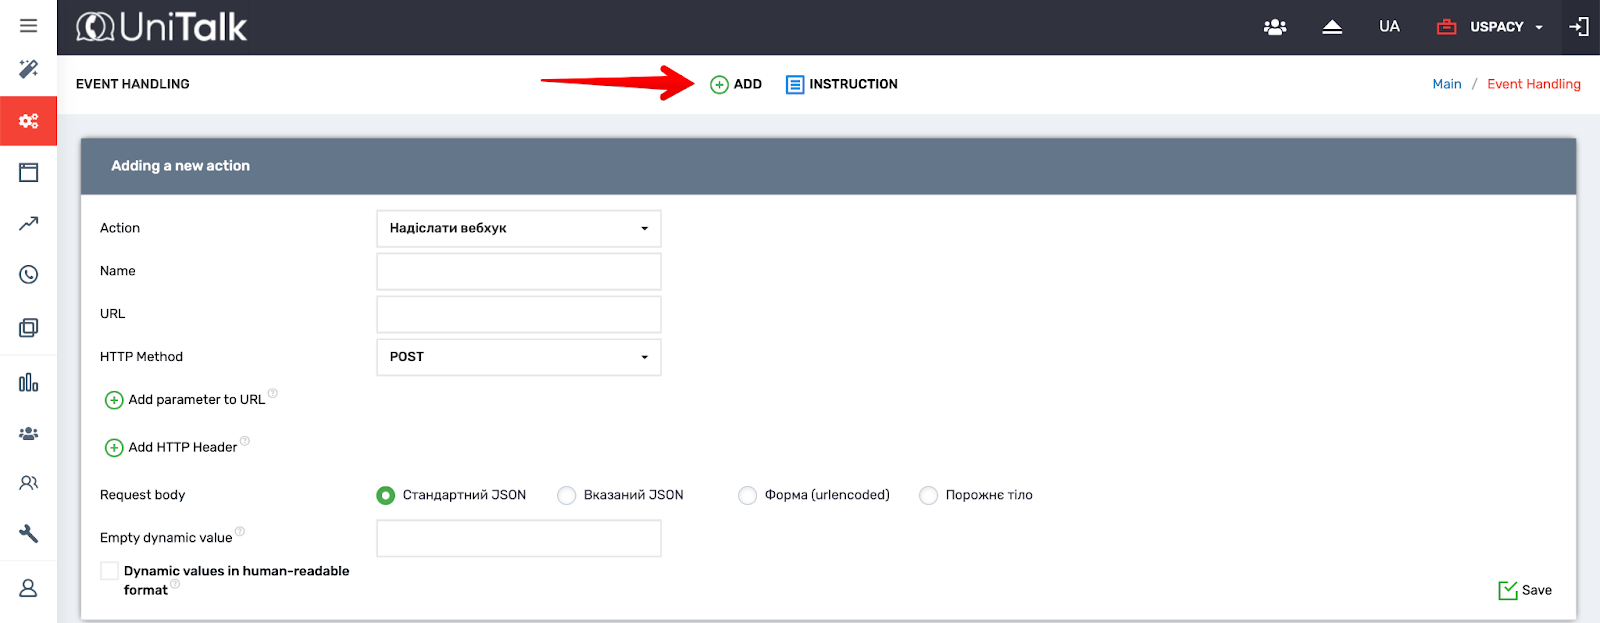
Action: Send webhook
Name: New call
💡 This link must be copied from the UniTalk app settings page in your Uspacy Space.
HTTP code: POST
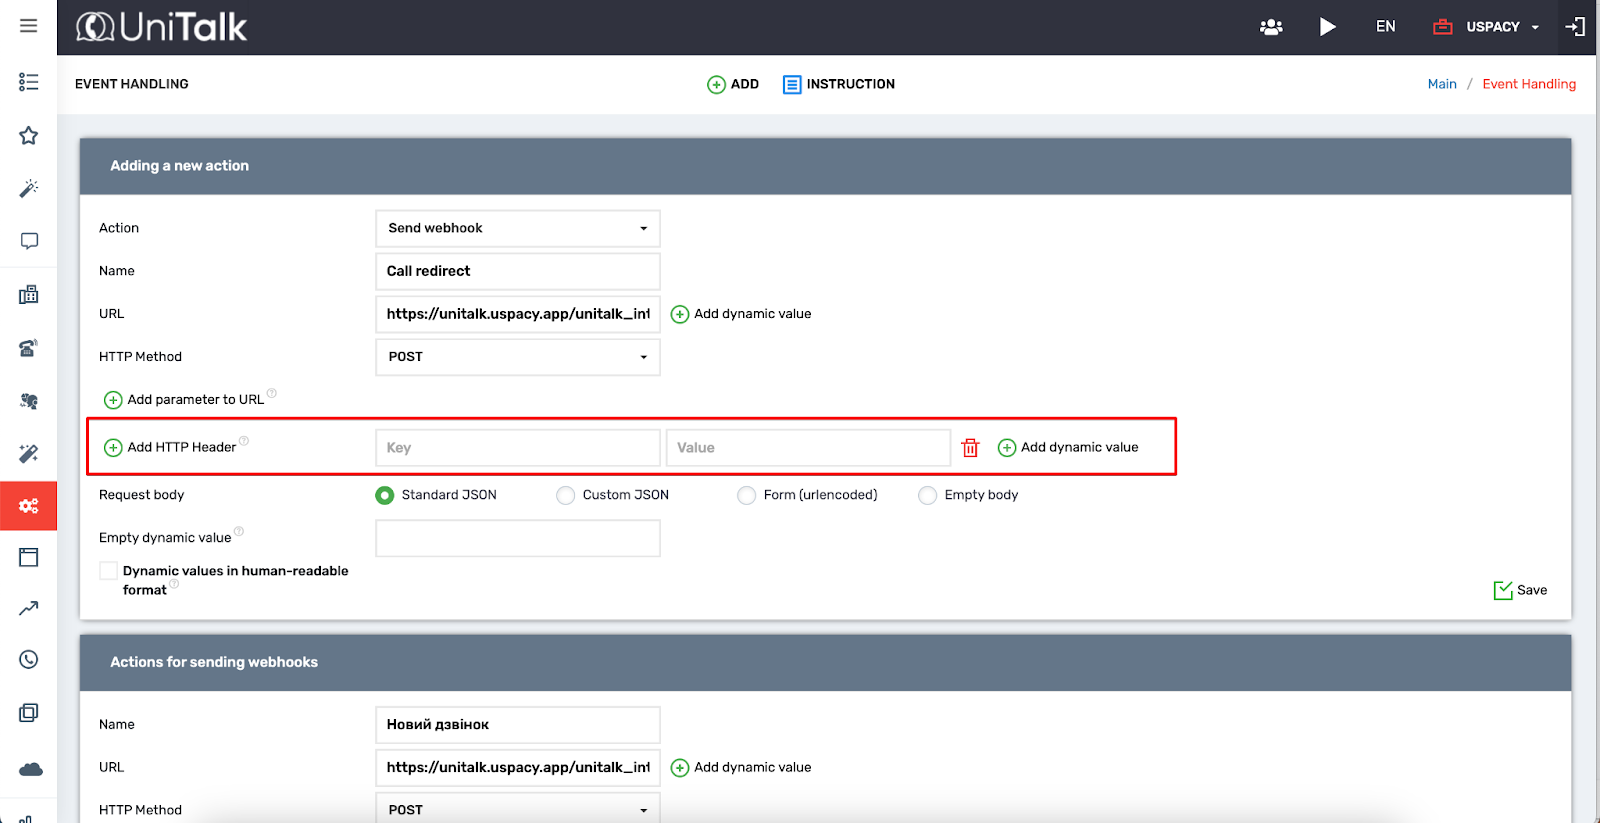
Next, click Add HTTP header and fill out the required fields:
Key: Authorization
Value: Your generated API key from the previous step

Request Body: The specified JSON
In the field below you need to insert the following value:
{
"event": "CALL_NEW",
"call": {
"id": "{{CALL_RANDOM_ID}}",
"dbid": "{{CALL_DB_ID}}",
"from": "{{CALLED_FROM}}",
"to": “{{CALLED_TO}}”,
"outerNumber": "{{OUTER_NUMBER}}",
"direction": "{{CALL_DIRECTION}}",
"date": "{{CALL_START_TIME}}",
"utmSource": "{{UTM_SOURCE}}",
"utmMedium": "{{UTM_MEDIUM}}",
"utmCampaign": "{{UTM_CAMPAIGN}}",
"utmTerm": "{{UTM_TERM}}",
"utmContent": "{{UTM_CONTENT}}",
"googleId": "{{GOOGLE_CLIENT_ID}}",
"facebookClientId": "{{FACEBOOK_CLIENT_ID}}",
"referer": "{{REFERER}}",
"comment": "{{CALL_META}}",
"source": "{{CALL_TYPE}}",
"meta": "{{CALL_META}}"
}
}
All that remains is Save webhook settings for new calls.
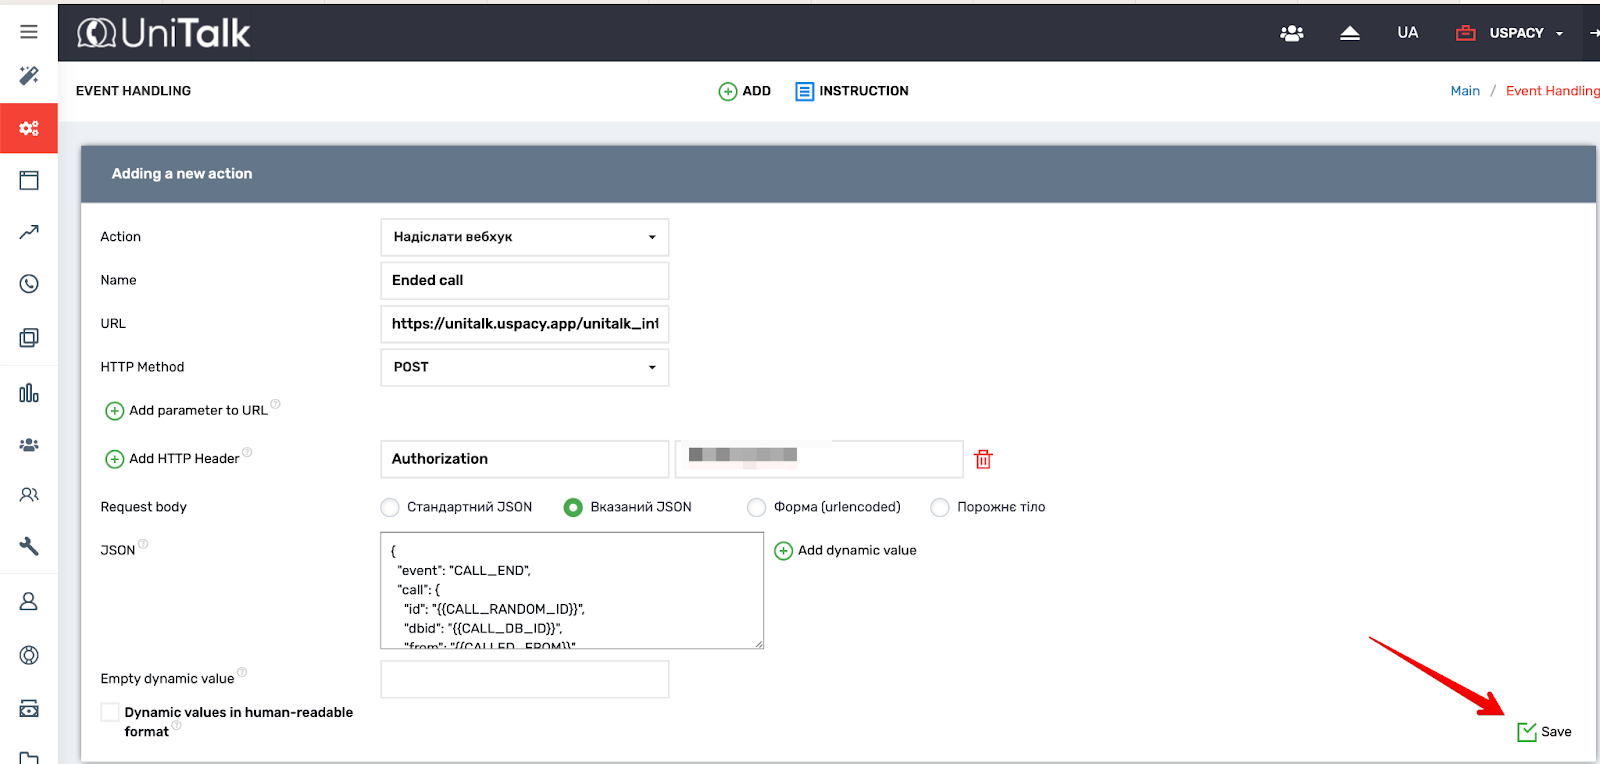
Ended call
Click Add webhook and fill out the creation form.

Action: Send webhook
Name: Ended call
💡 This link must be copied from the UniTalk app settings page in your Uspacy Space.
HTTP code: POST
Next, click Add HTTP header and fill out the required fields:
Key: Authorization
Value: Your generated API key from the previous step

Request Body: The specified JSON
And in the field below you need to insert the following value:
{
"event": "CALL_END",
"call": {
"id": "{{CALL_RANDOM_ID}}",
"dbid": "{{CALL_DB_ID}}",
"from": "{{CALLED_FROM}}",
"to": "{{CALLED_TO}}",
"outerNumber": "{{OUTER_NUMBER}}",
"direction": "{{CALL_DIRECTION}}",
"date": "{{CALL_START_TIME}}",
"secondsFullTime": "{{CALL_SECONDS_FULL}}",
"secondsTalk": "{{CALL_SECONDS_TALK}}",
"utmSource": "{{UTM_SOURCE}}",
"utmMedium": "{{UTM_MEDIUM}}",
"utmCampaign": "{{UTM_CAMPAIGN}}",
"utmTerm": "{{UTM_TERM}}",
"utmContent": "{{UTM_CONTENT}}",
"googleId": "{{GOOGLE_CLIENT_ID}}",
"facebookClientId": "{{FACEBOOK_CLIENT_ID}}",
"referer": "{{REFERER}}",
"comment": "{{CALL_META}}",
"state": "{{CALL_STATUS}}",
"source": "{{CALL_TYPE}}",
"link": "{{CALL_AUDIO_LINK}}",
"meta": "{{CALL_META}}",
"cause": "{{CALL_END_CODE}}"
}
}
All that remains is Save webhook settings for completed calls.
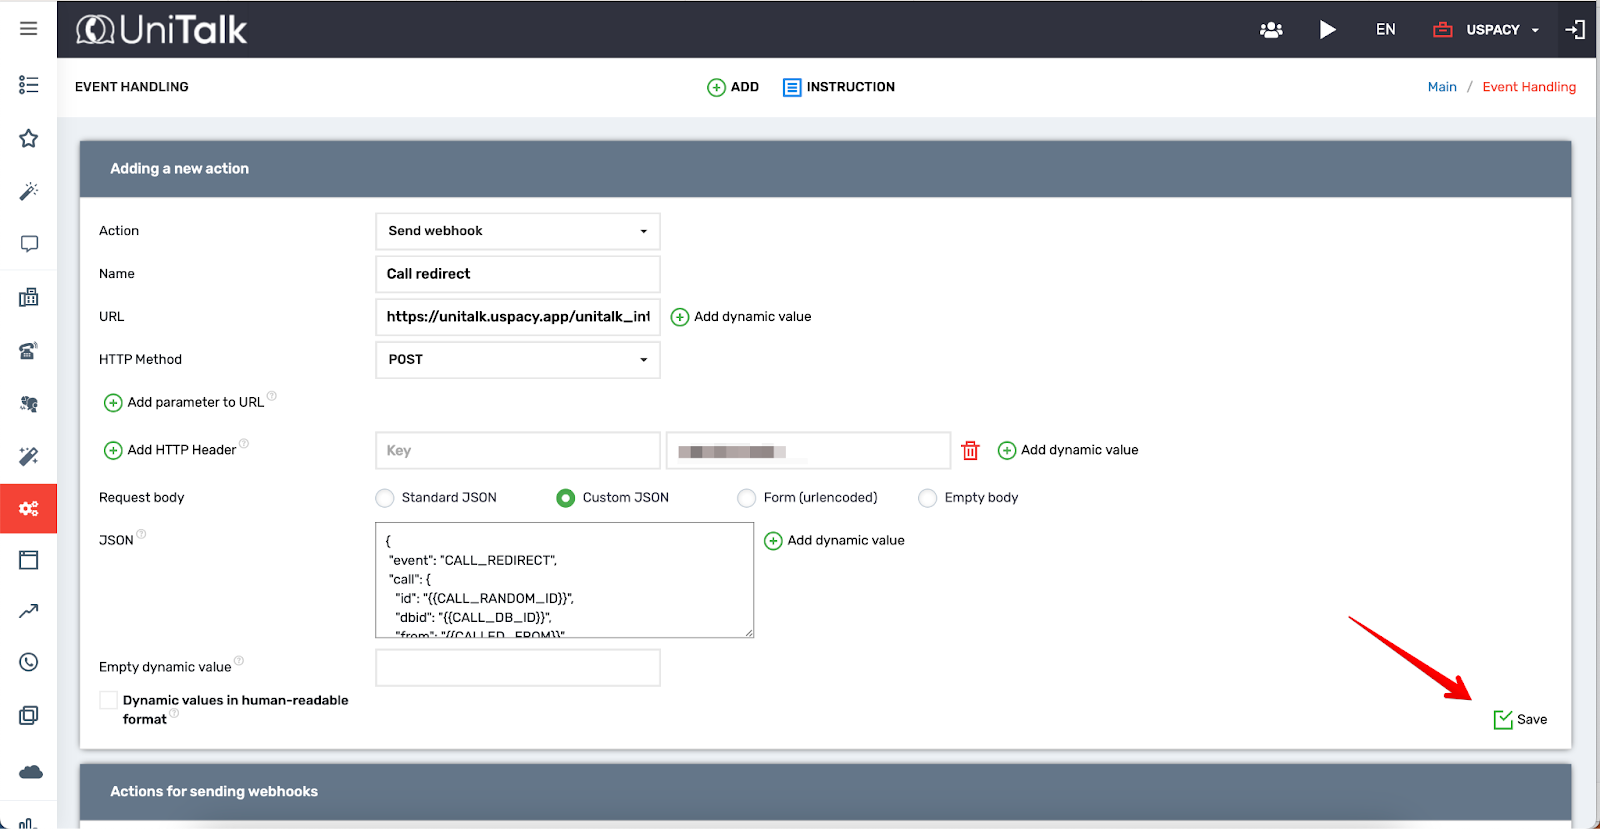
Call redirect
Click Add webhook and fill out the creation form.

Action: Send webhook
Name: Call redirect
💡 This link must be copied from the UniTalk app settings page in your Uspacy Space.
HTTP code: POST
Next, click Add HTTP header and fill out the required fields:
Key: Authorization
Value: Your generated API key from the previous step
Request Body: The specified JSON
And in the field below you need to insert the following value:
{
"event": "CALL_REDIRECT",
"call": {
"id": "{{CALL_RANDOM_ID}}",
"dbid": "{{CALL_DB_ID}}",
"from": "{{CALLED_FROM}}",
"to": "{{CALLED_TO}}",
"outerNumber": "{{OUTER_NUMBER}}",
"direction": "{{CALL_DIRECTION}}",
"date": "{{CALL_START_TIME}}",
"secondsFullTime": "{{CALL_SECONDS_FULL}}",
"secondsTalk": "{{CALL_SECONDS_TALK}}",
"utmSource": "{{UTM_SOURCE}}",
"utmMedium": "{{UTM_MEDIUM}}",
"utmCampaign": "{{UTM_CAMPAIGN}}",
"utmTerm": "{{UTM_TERM}}",
"utmContent": "{{UTM_CONTENT}}",
"googleId": "{{GOOGLE_CLIENT_ID}}",
"facebookClientId": "{{FACEBOOK_CLIENT_ID}}",
"referer": "{{REFERER}}",
"comment": "{{CALL_META}}",
"state": "{{CALL_STATUS}}",
"source": "{{CALL_TYPE}}",
"link": "{{CALL_AUDIO_LINK}}",
"meta": "{{CALL_META}}",
"cause": "{{CALL_END_CODE}}"
}
}
All that remains is Save webhook settings for completed calls.
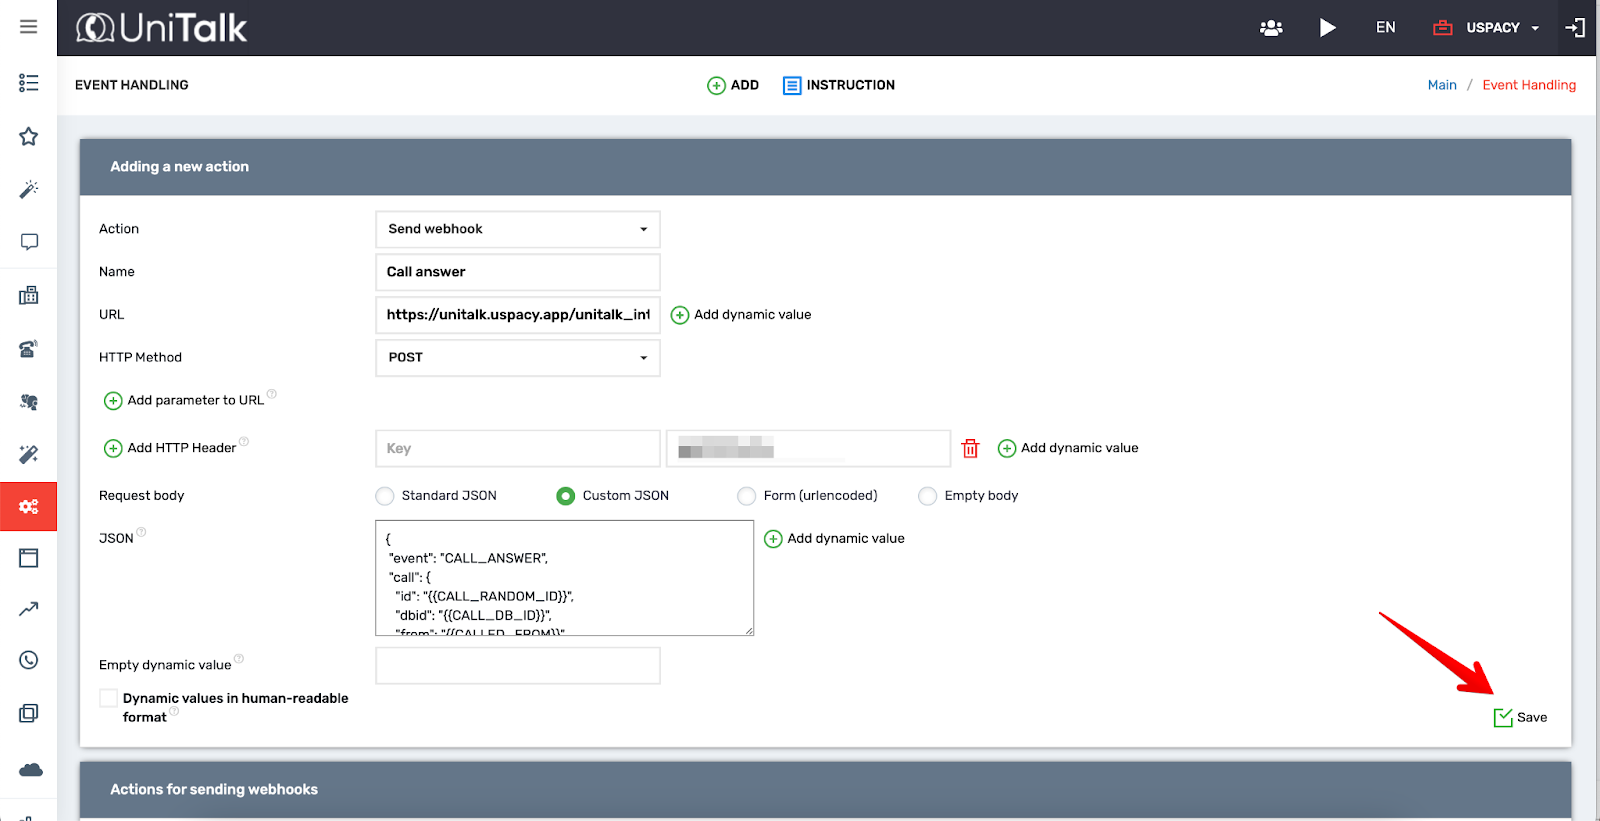
Call answer
Click Add webhook and fill out the creation form.
Action: Send webhook
Name: Call answer
💡 This link must be copied from the UniTalk app settings page in your Uspacy Space.
HTTP code: POST
Next, click Add HTTP header and fill out the required fields:
Key: Authorization
Value: Your generated API key from the previous step
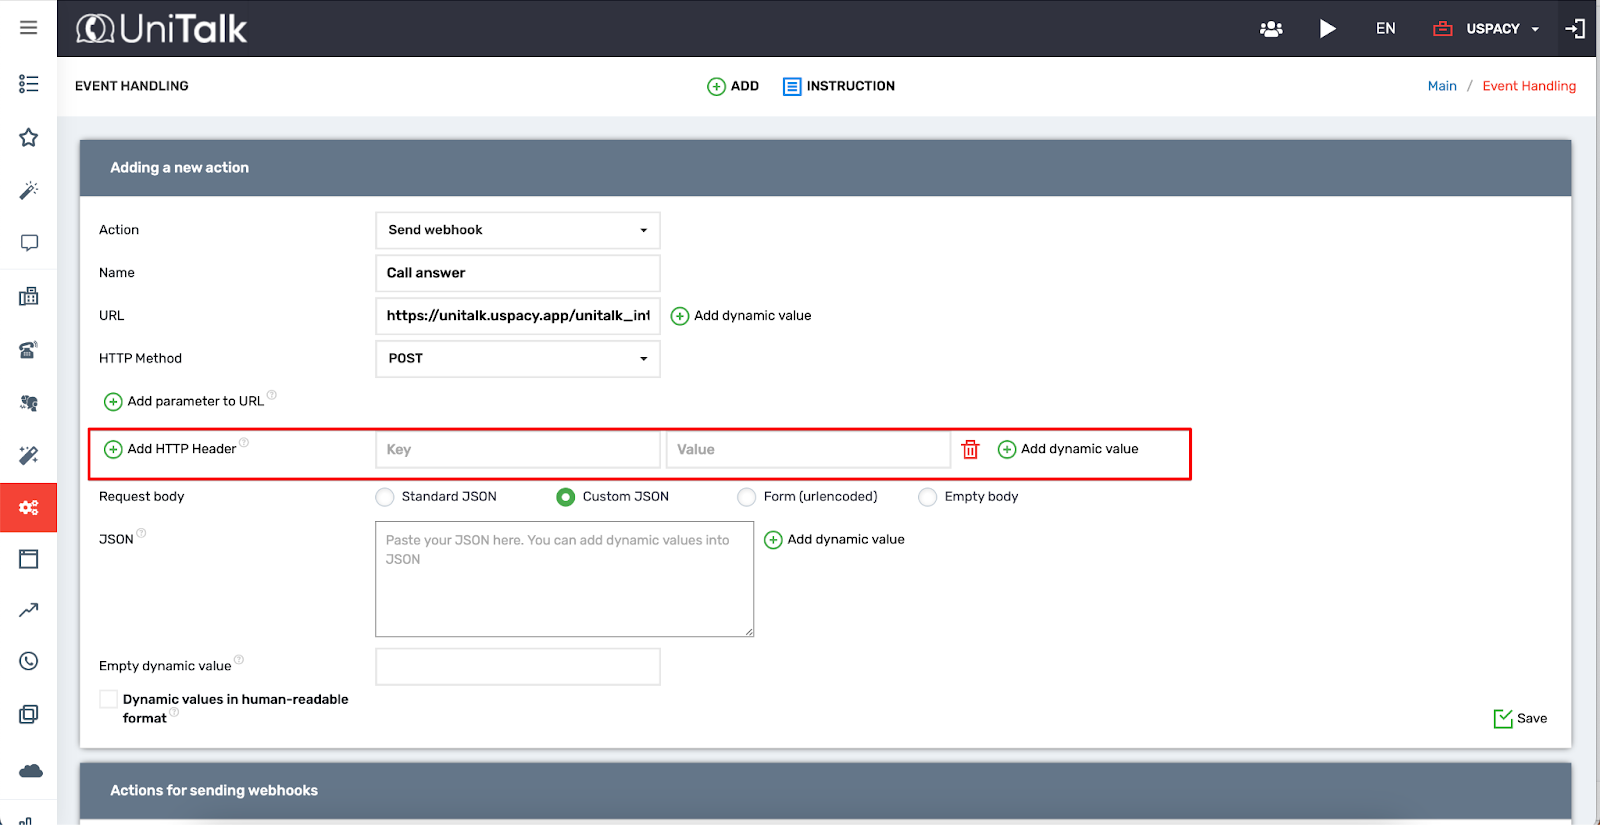
Request Body: The specified JSON
And in the field below you need to insert the following value:
{
"event": "CALL_ANSWER",
"call": {
"id": "{{CALL_RANDOM_ID}}",
"dbid": "{{CALL_DB_ID}}",
"from": "{{CALLED_FROM}}",
"to": "{{CALLED_TO}}",
"outerNumber": "{{OUTER_NUMBER}}",
"direction": "{{CALL_DIRECTION}}",
"date": "{{CALL_START_TIME}}",
"secondsFullTime": "{{CALL_SECONDS_FULL}}",
"secondsTalk": "{{CALL_SECONDS_TALK}}",
"utmSource": "{{UTM_SOURCE}}",
"utmMedium": "{{UTM_MEDIUM}}",
"utmCampaign": "{{UTM_CAMPAIGN}}",
"utmTerm": "{{UTM_TERM}}",
"utmContent": "{{UTM_CONTENT}}",
"googleId": "{{GOOGLE_CLIENT_ID}}",
"facebookClientId": "{{FACEBOOK_CLIENT_ID}}",
"referer": "{{REFERER}}",
"comment": "{{CALL_META}}",
"state": "{{CALL_STATUS}}",
"source": "{{CALL_TYPE}}",
"link": "{{CALL_AUDIO_LINK}}",
"meta": "{{CALL_META}}",
"cause": "{{CALL_END_CODE}}"
}
}
All that remains is Save webhook settings for completed calls.
Step 4. Outgoing webhooks handling
Step 4. Outgoing webhooks handling
In order for the system to start sending data on call events from UniTalk to Uspacy, you need to add the created webhooks to the Call Event Handling (Outgoing Webhooks) block in the Integrations - API section.
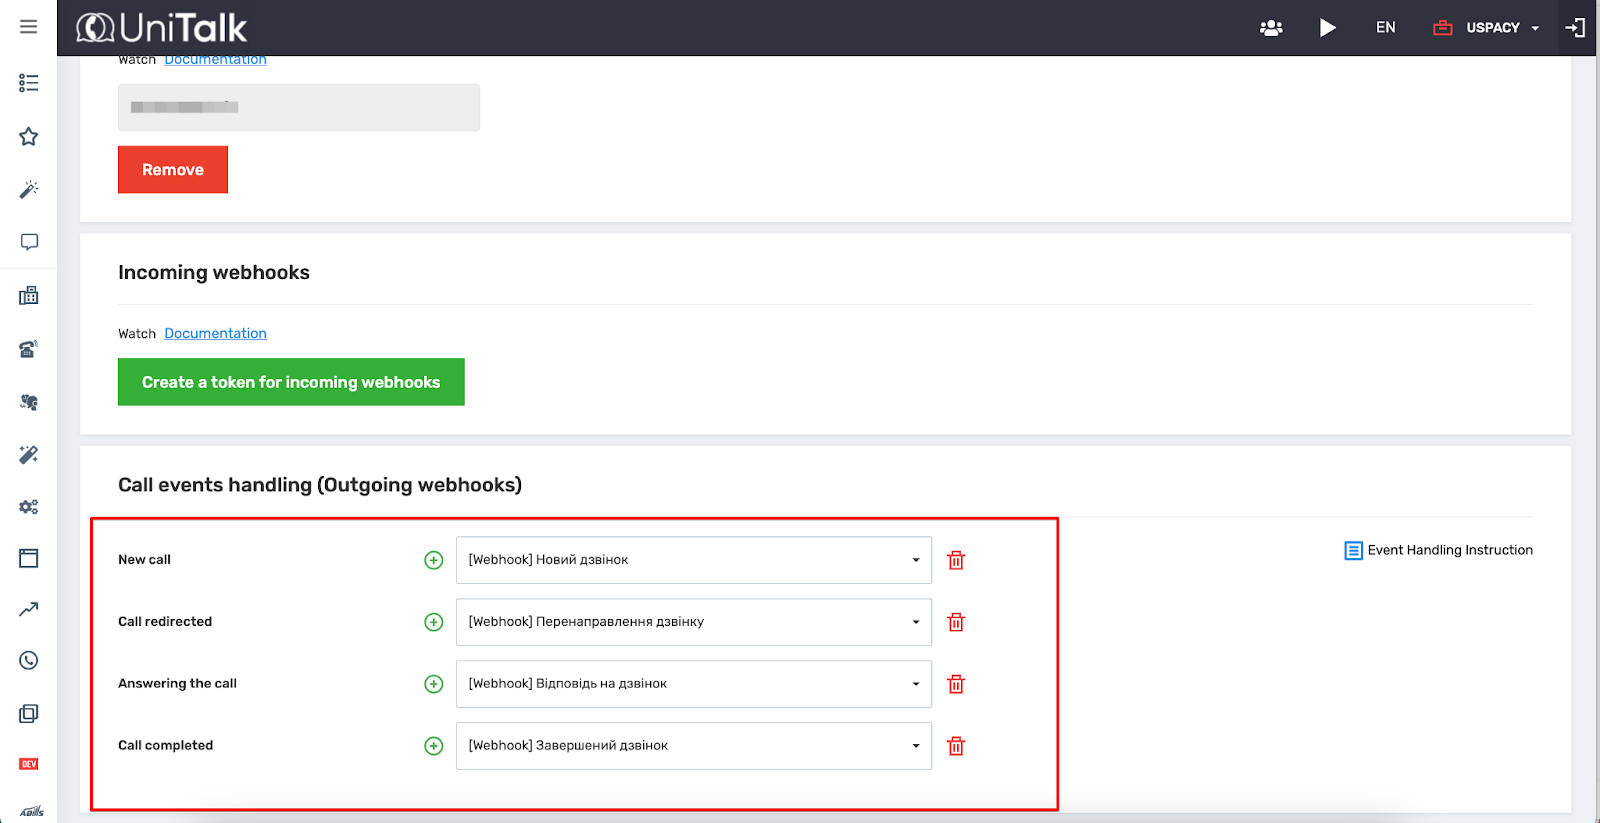
New call - the webhook is sent when the call is initialized. That is, as soon as information about a new call (incoming/outgoing) reaches the Unitalk system, this webhook is sent to Uspacy.
Call redirect – the event notifies to which operator a call is redirected. But at the same time there was no response to the call.
Call answer - the webhook is sent when the operator has answered the phone.
Call ended - The webhook is sent when the call is ended. The call can be missed, i.e. unsuccessful, or accepted if the call is successful.
In this way, data about the start or end of a call is received in the CRM system.
Step 5. Matching users lines to persons responsible
Step 5. Matching users lines to persons responsible
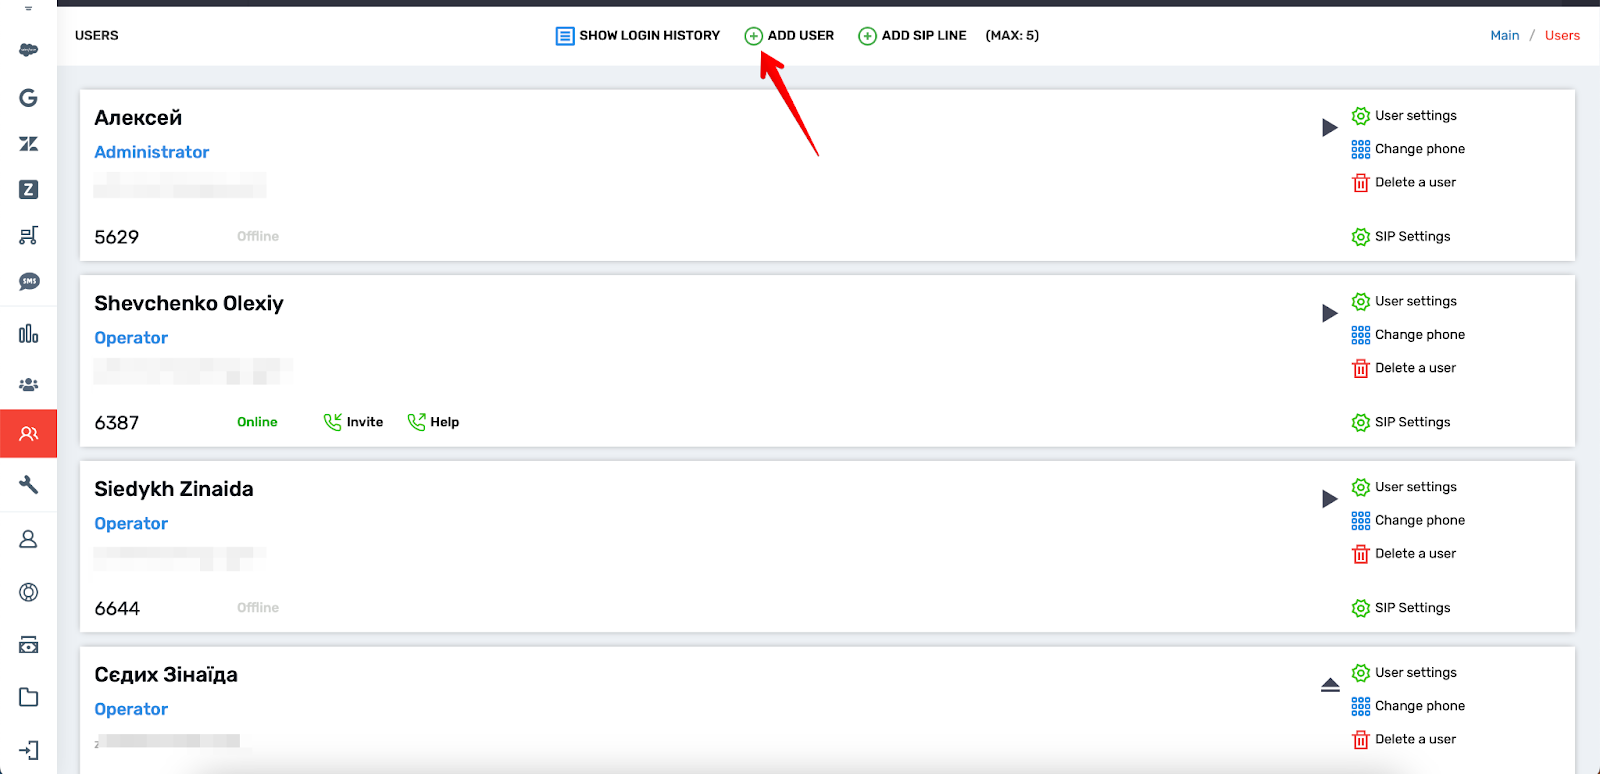
In order for several employees to be able to work with telephony, you need to create separate lines for each of them. You can do this in the Users section.
So, first you need to click ADD SIP LINE.
☝🏻 Please note that the number of SIP lines should be based on the calculation - 1 line per 1 employee who will be connected to telephony.
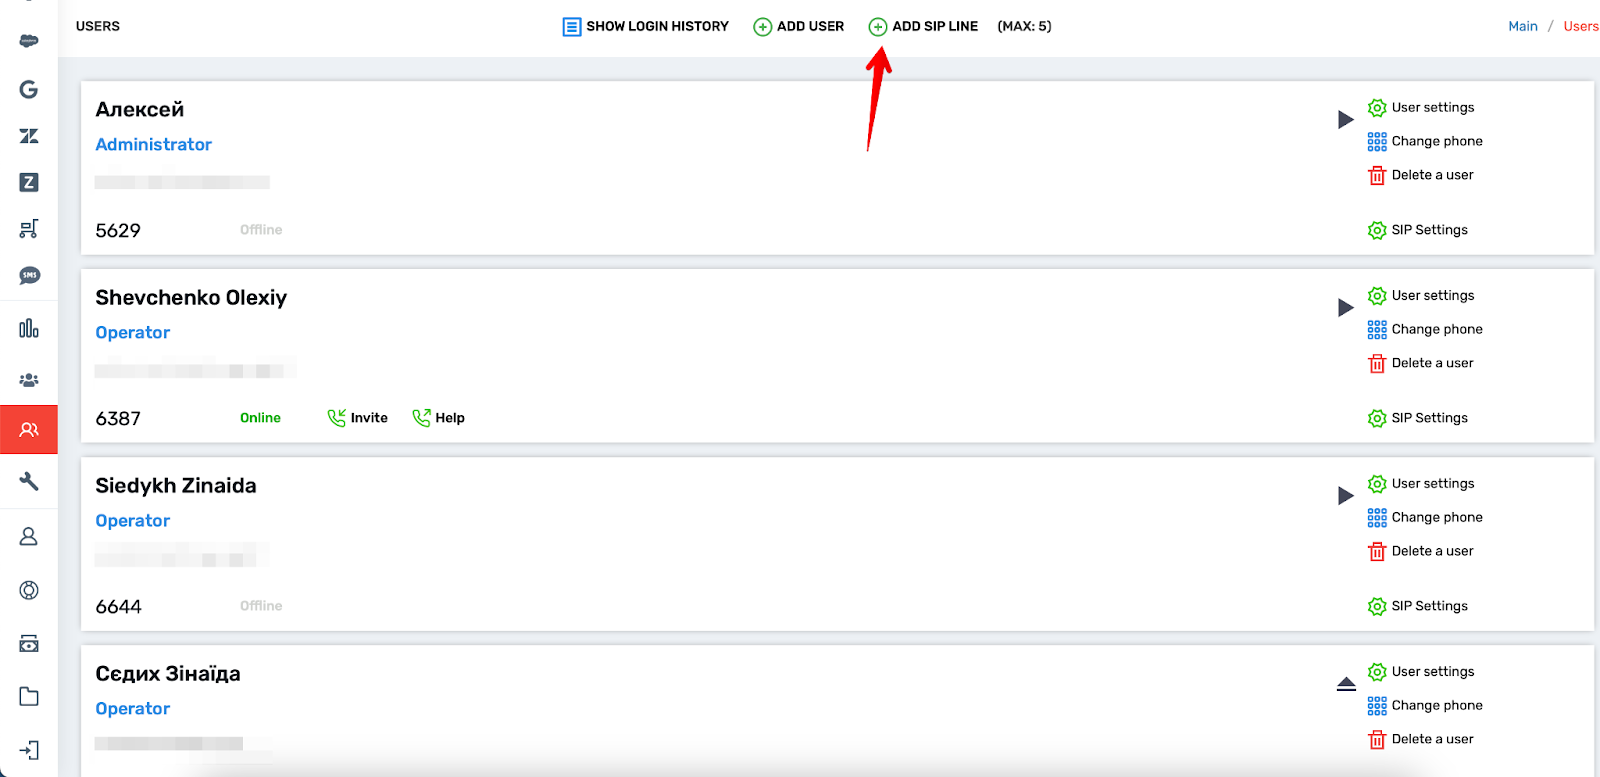
Next you need to ADD USER.
To start with, you need to enter an email, so that other fields, which must also be filled out, open.

Next, we specify the role, select the SIP line we created from the list, enter the first and last name, and we also need to Generate a password.
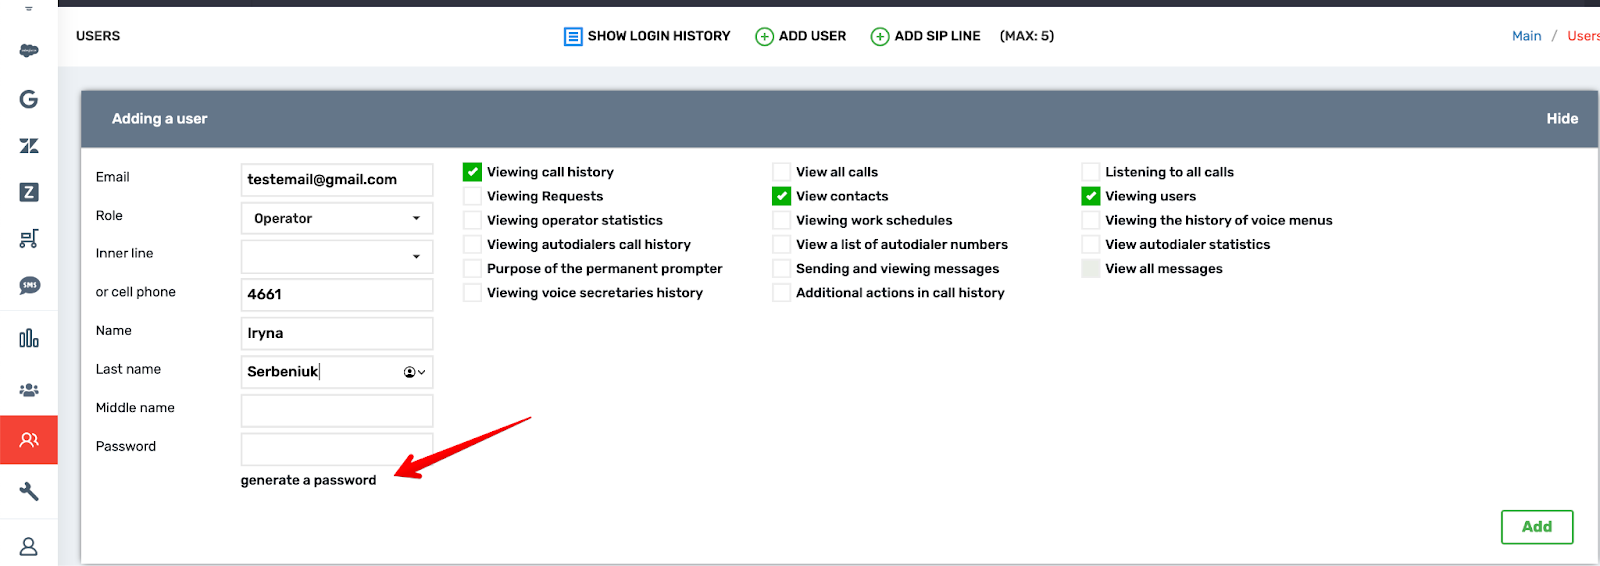
Click Add. Now the employee is matched to the SIP line.
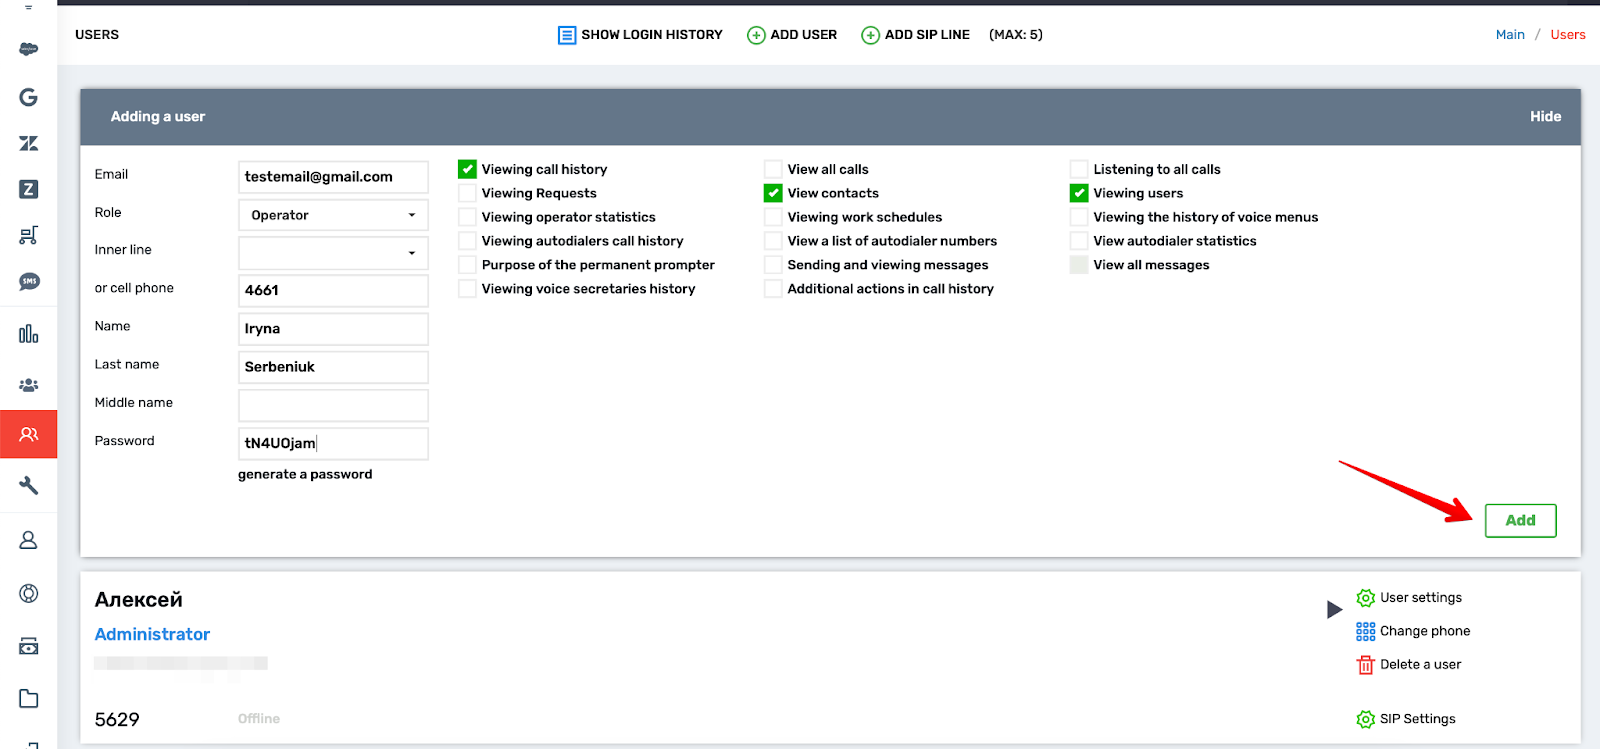
The generated password and specified email will be used later to log in to the UniTalk Web dialer extension for Google Chrome.
The inner line number is for Uspacy settings.
Step 5.1 Configuring input scenarios. Redirection
For the convenience of working with incoming calls from known contacts that already exist in the CRM database, it is possible to direct calls to the managers responsible for these contacts at once. As well as settings for redirecting in case of no response.
To do this, you need to go to the Incoming scenarios menu item in your UniTalk personal account.
Next, click ADD SCENARIO.

A settings form will open. Here, first enter the name of the scenario.
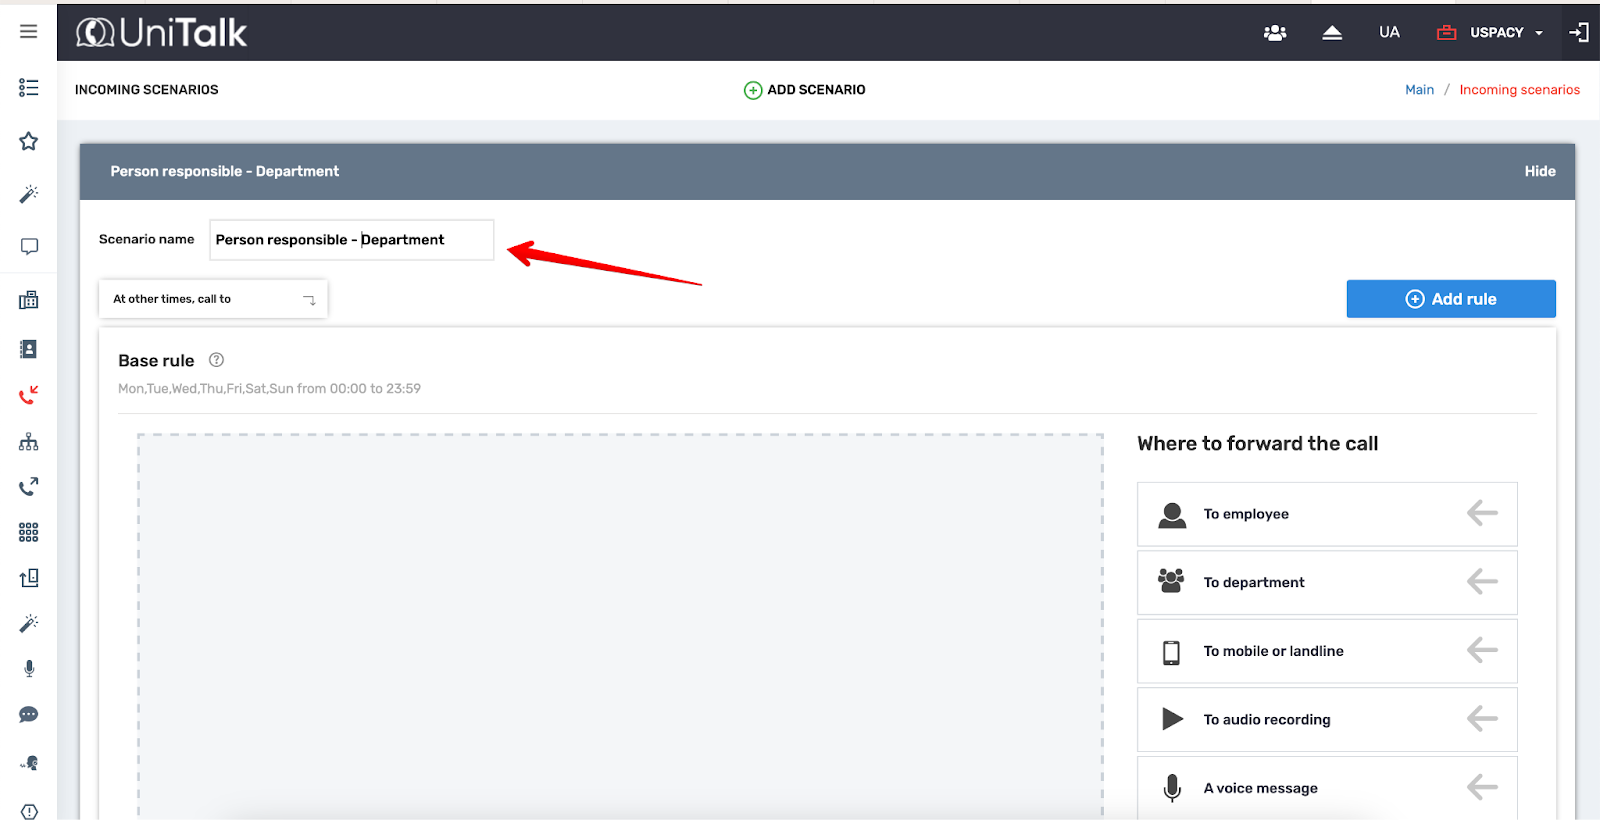
Then you can proceed directly to the creation of the scenario itself.
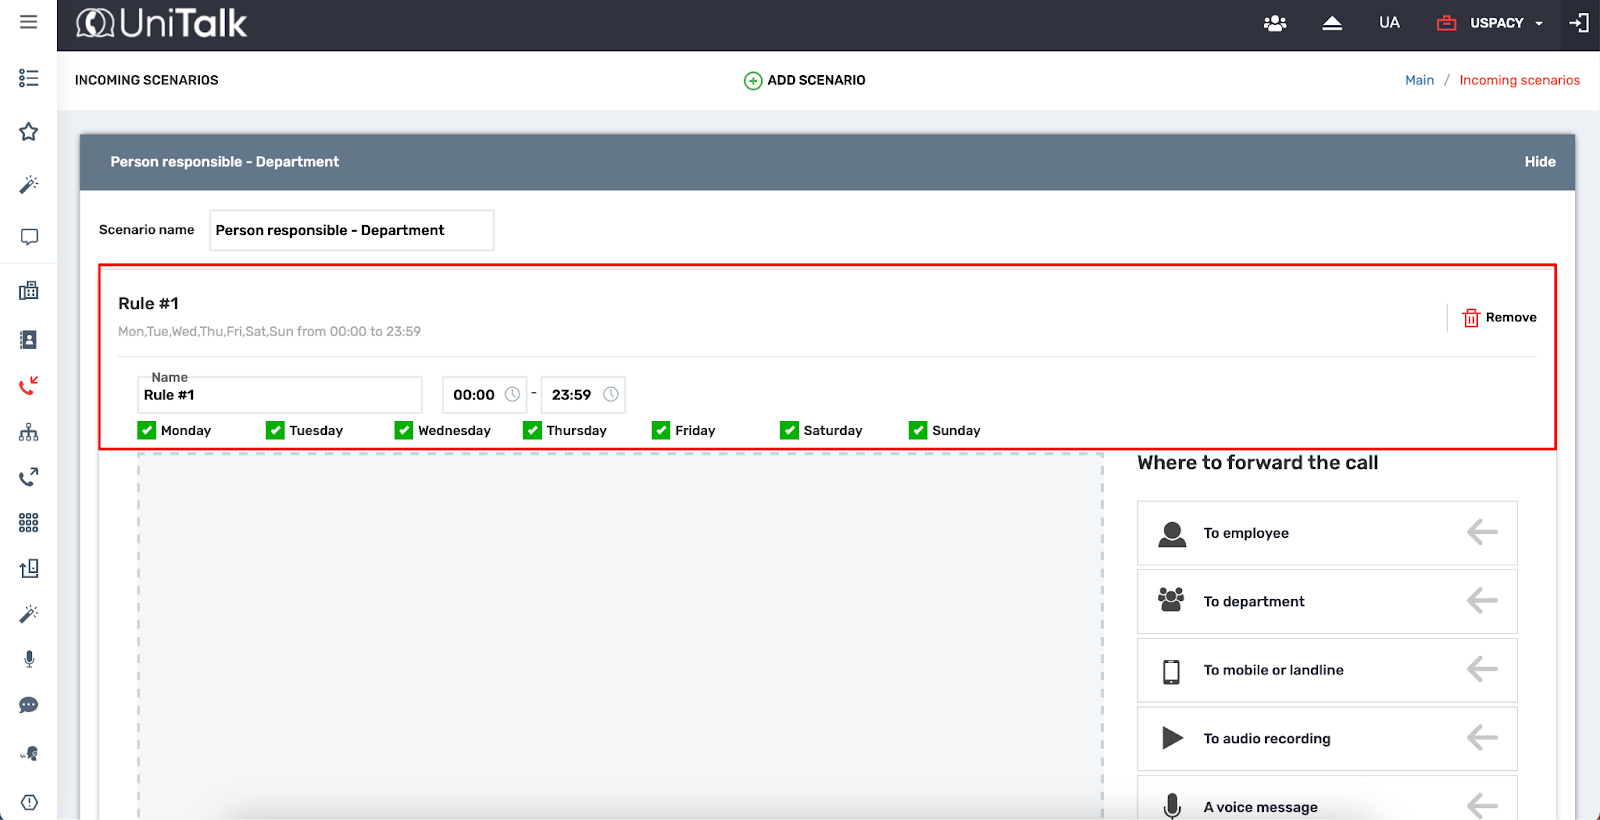
💡 You can use the Basic Working Time Rule. That is, the scenario will work continuously, from Monday to Sunday from 00:00 to 23:59.
Or add your own and specify the working days and hours you need.
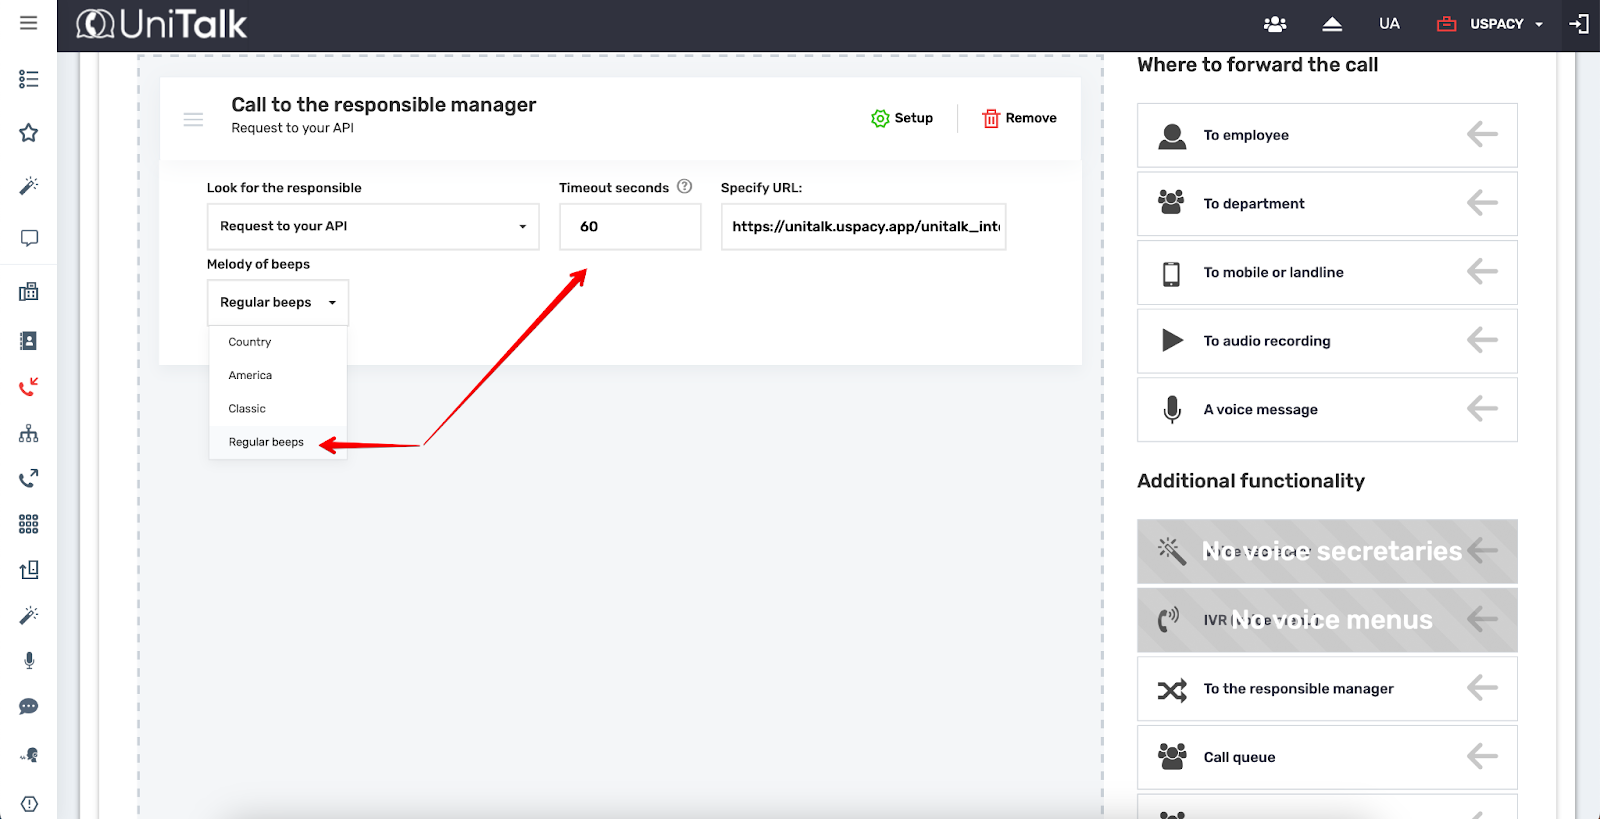
To start, drag the block On the responsible manager to the appropriate area.

Next, configure its parameters. In the Search responsible field, you must specify Request to Your API.
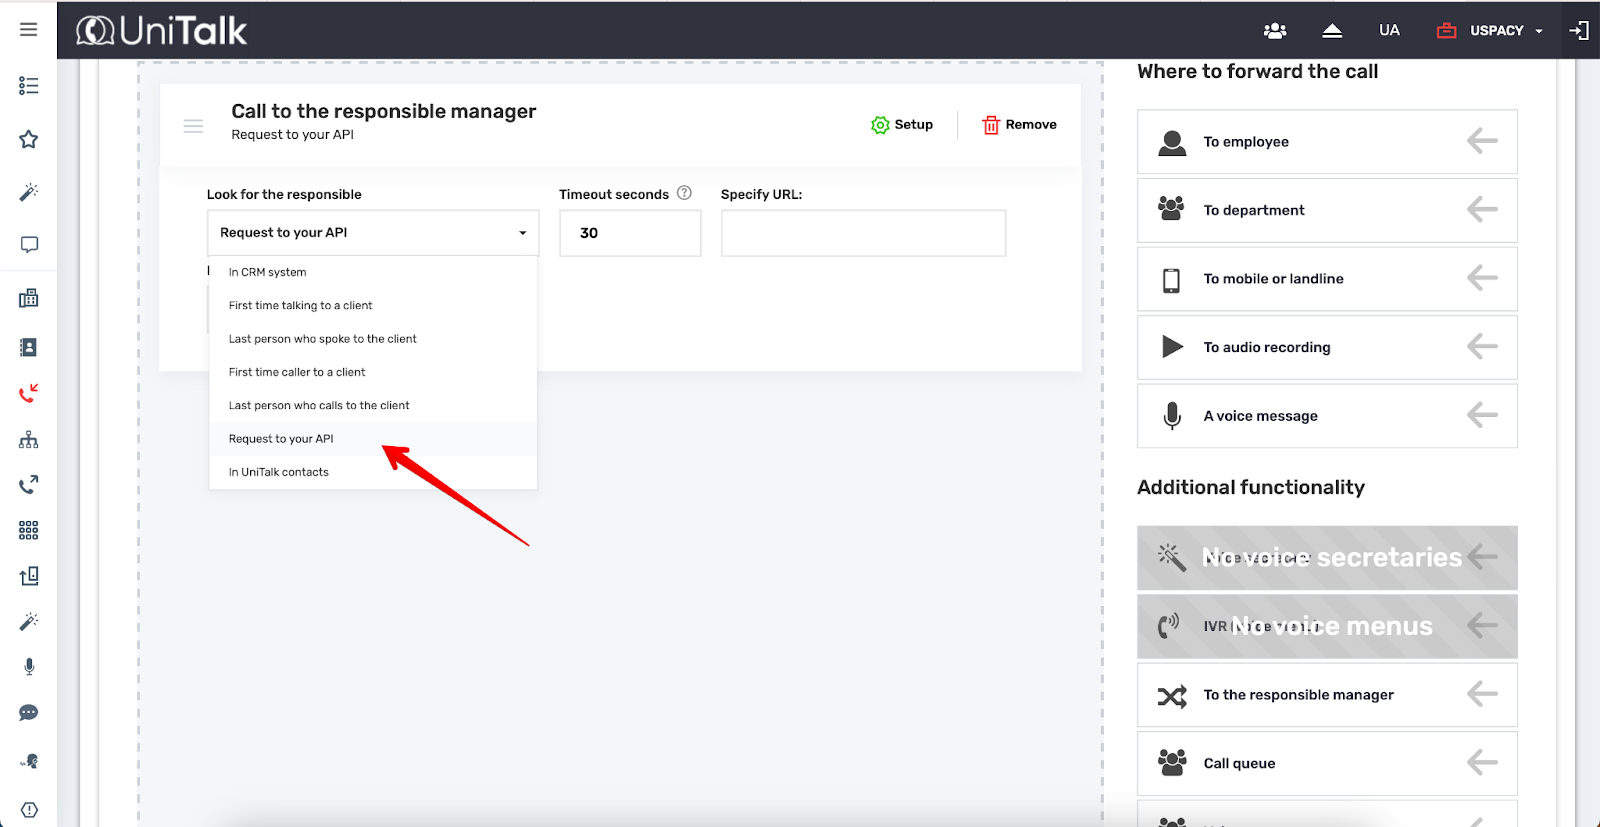
Another important parameter is the URL.

The following value should be entered in this field:
https://unitalk.uspacy.app/unitalk_integration/v1/call_events/route?key=N
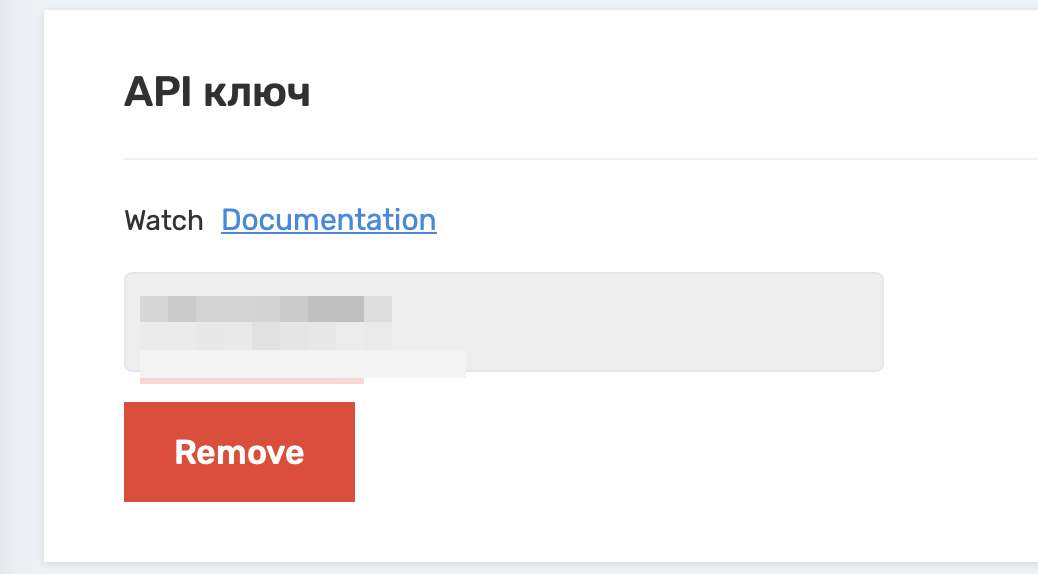
Where N is the API Key. It can be found in the corresponding field in the Integrations - API section.
Then it remains to specify the waiting time and choose the ringtone. These fields are filled out according to your own needs and tastes.
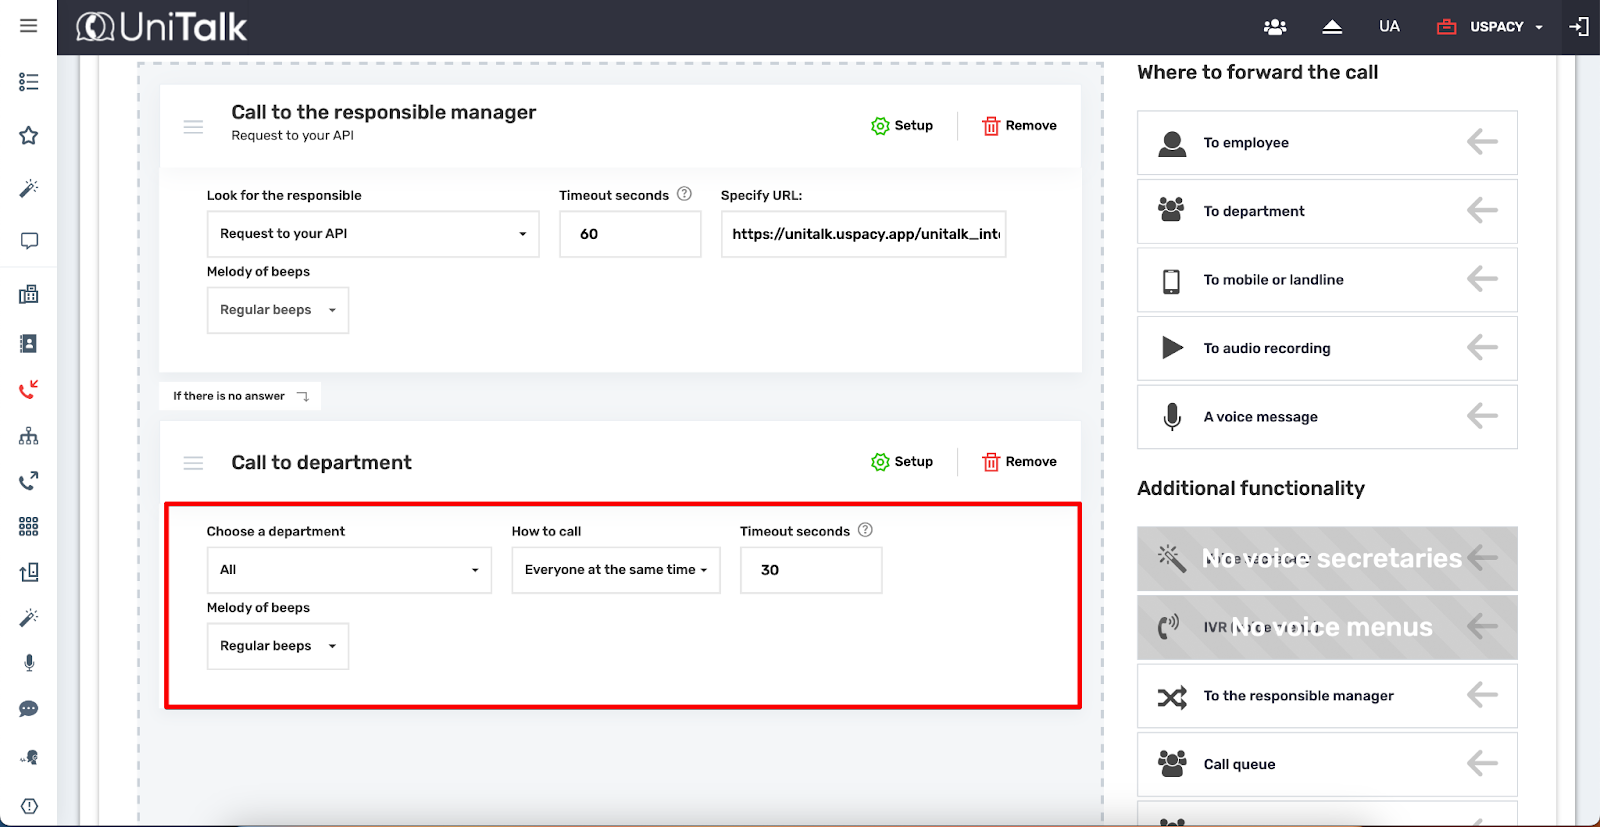
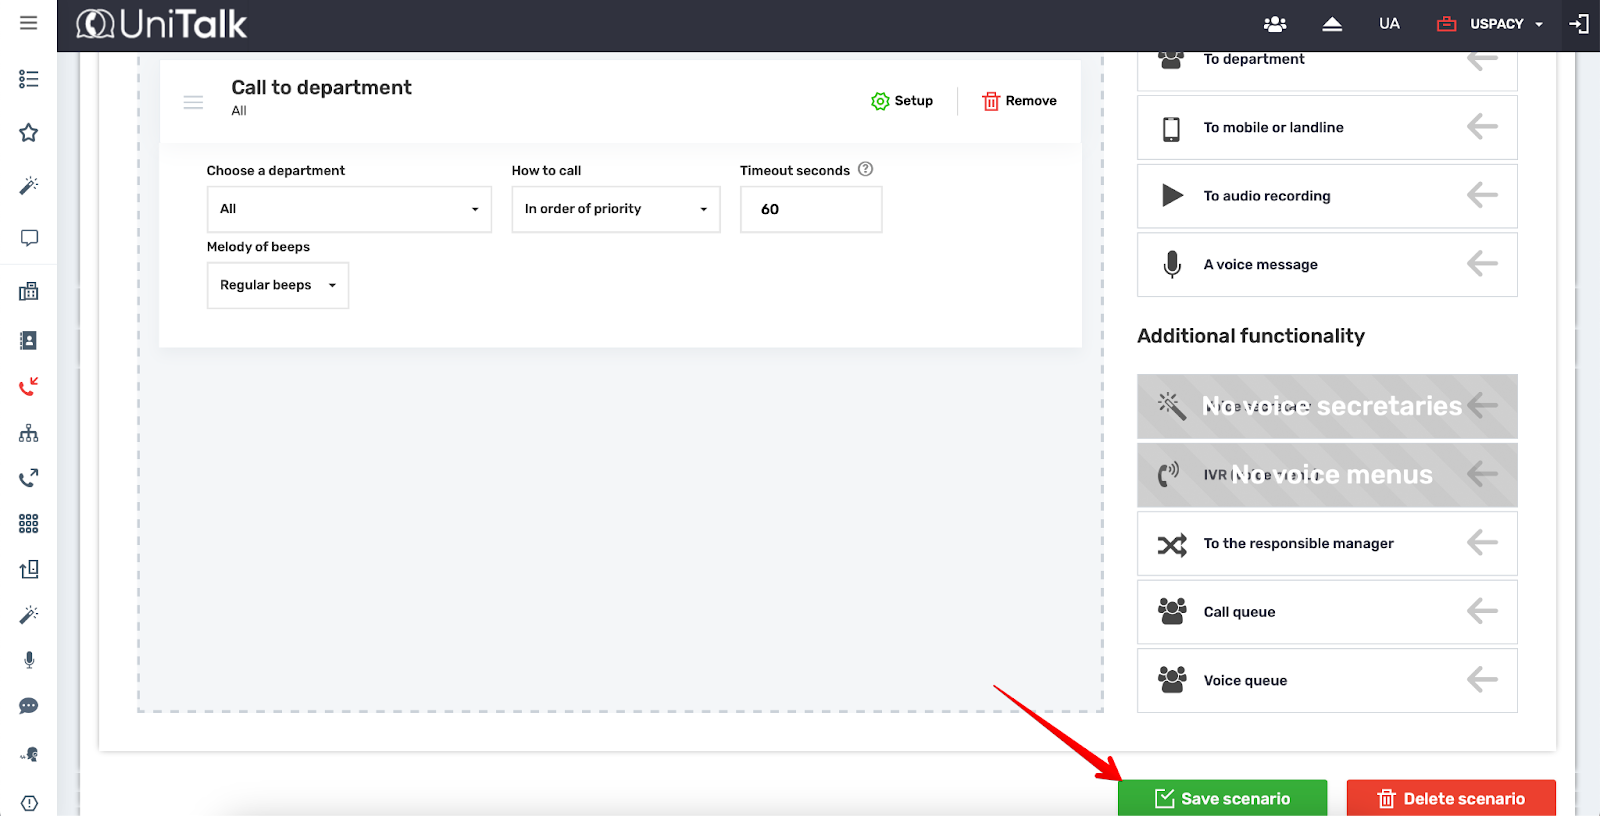
When the settings of this block are completed, it is necessary to specify how incoming calls from known contacts will be distributed if the managers responsible for them do not accept them. To do this, you need to drag the item To the department to the appropriate area.

Then it remains to configure it according to needs.
💡 Pay attention!
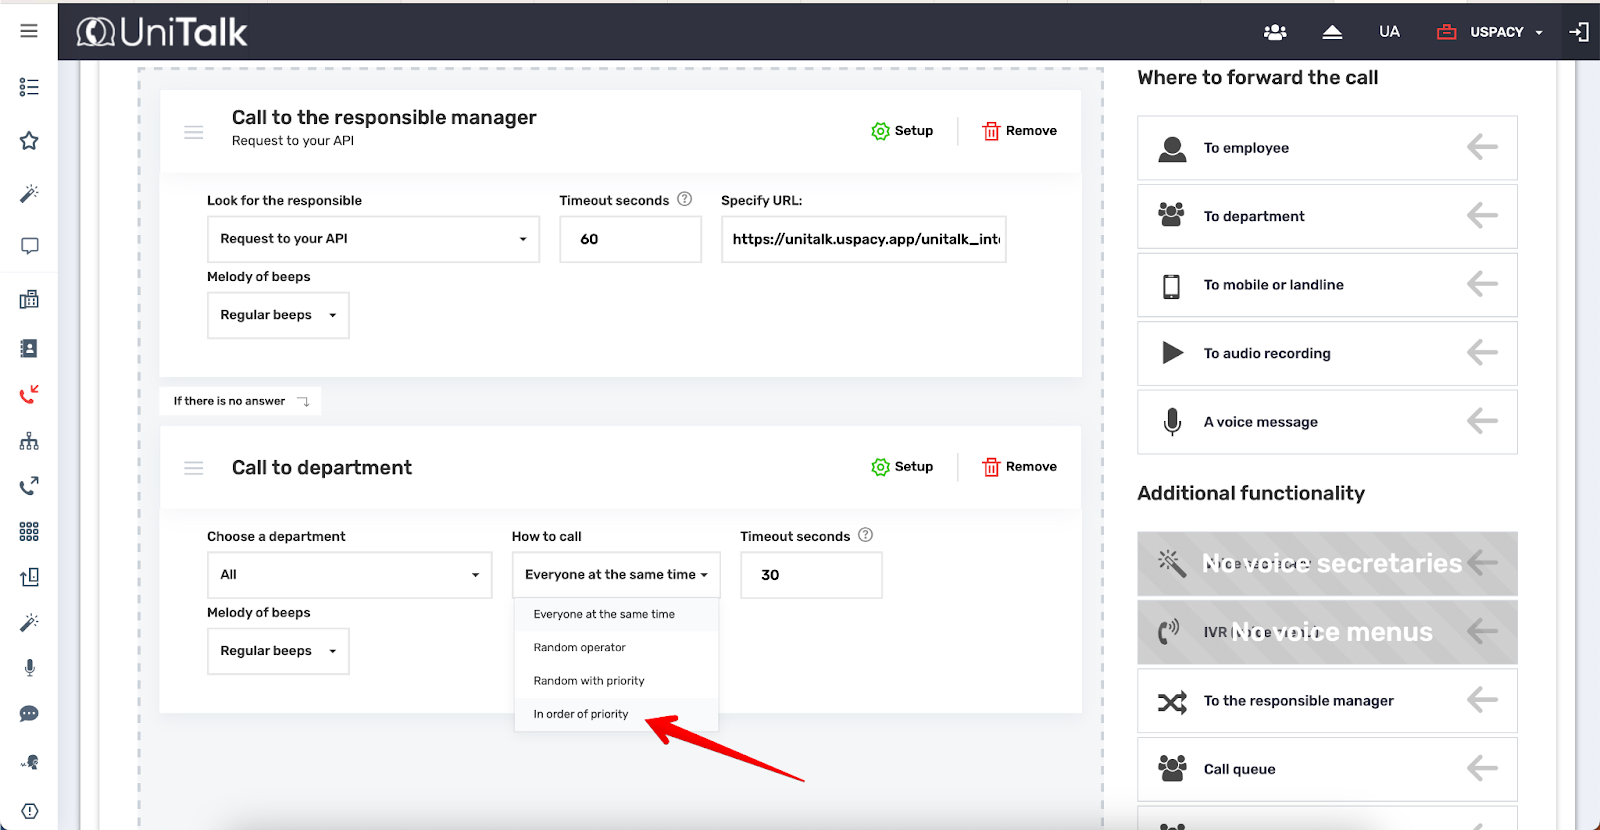
For the How to call parameter, you can better choose one of these values: To a random operator, Random with priority, In order of priority.
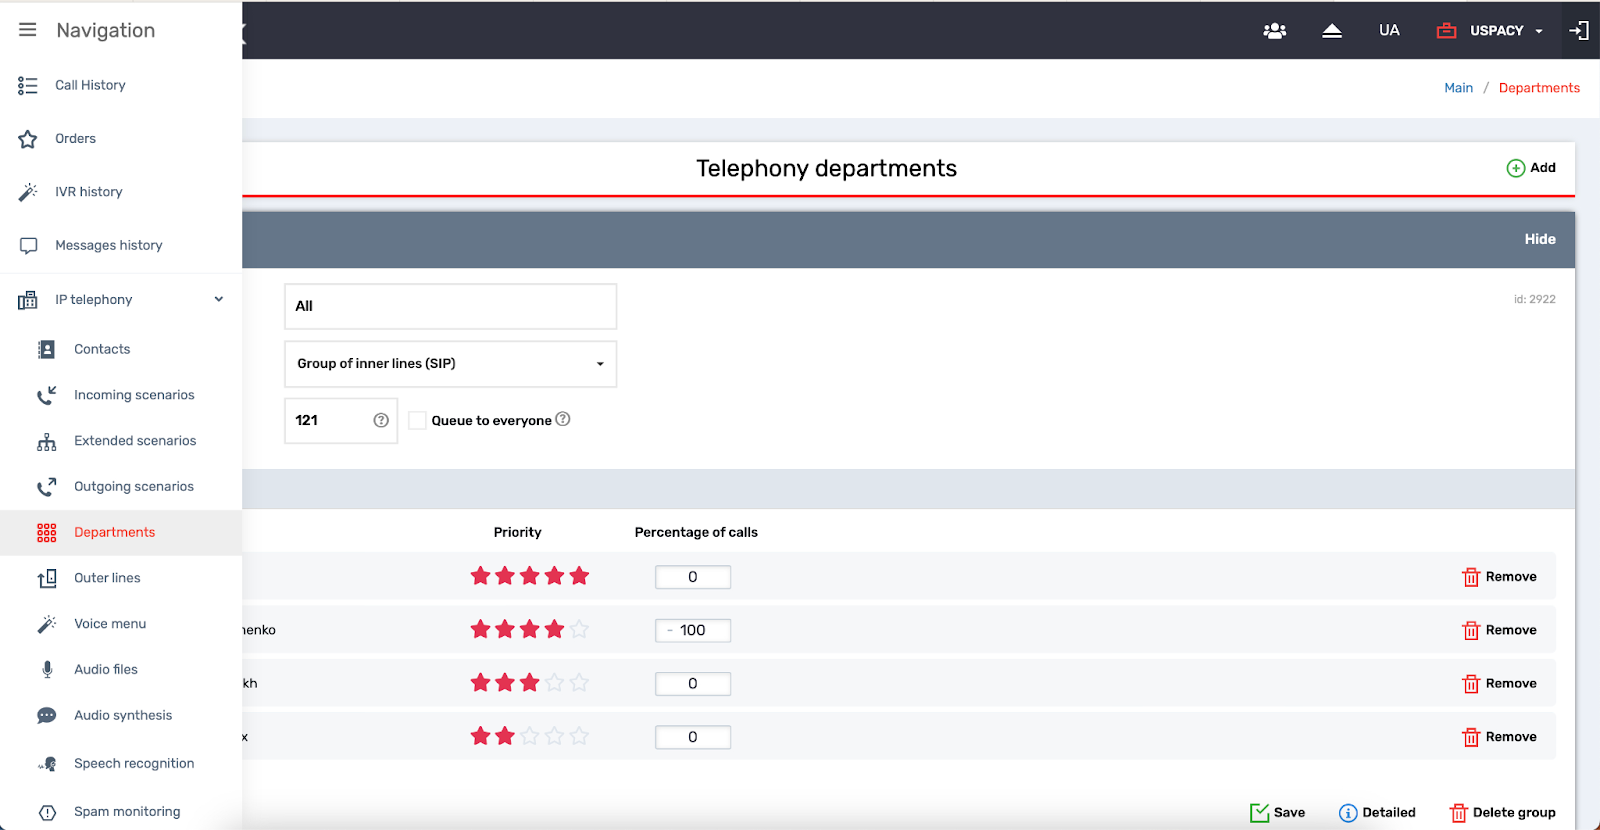
The required numbers that will be used for forwarding must be added to the department. To do this, configure it in the appropriate section of your Unitalk personal account.
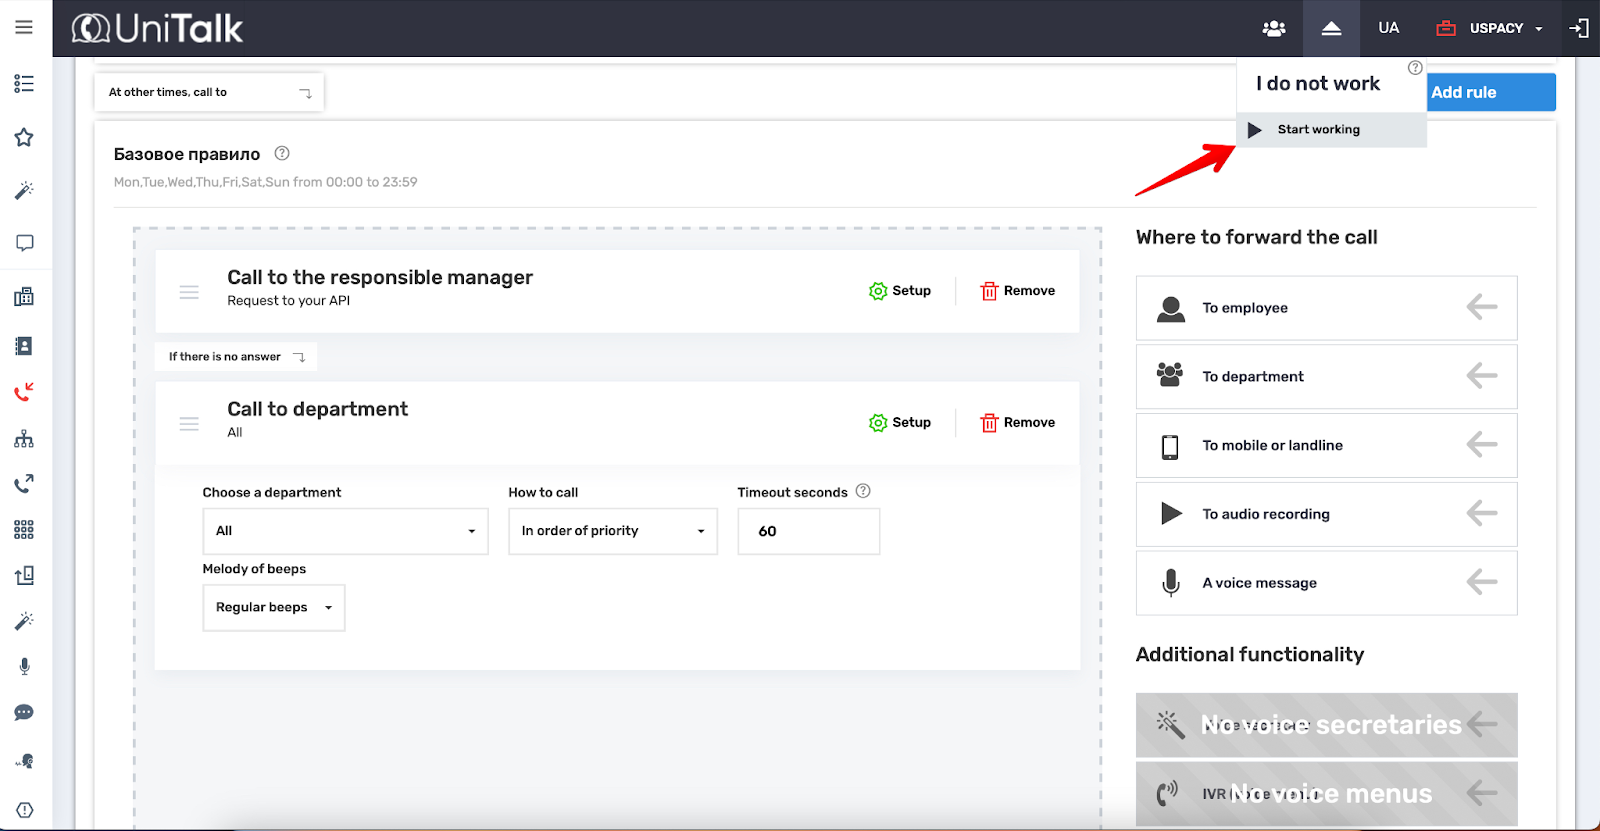
The settings are completed at this stage. All that remains is Save the scenario.
💡 Advice! For managers to start receiving calls, each manager must click Start working.
Uspacy settings
In the Marketplace section, there is the free UniTalk telephony application, which after its installation and additional settings will allow you to call clients or receive calls from them.
Step 1. Installation
Step 1. Installation
First you need to install this app in your Space. To do this, click Get.
Next, we go to the settings of the already installed application.
Step 2. Connection status
Step 2. Connection status
In this settings block, you will only need to enter the API key that was created when configuring the UniTalk.
And click Check connection.
As a result, the connection status should change.
💡 The Uspacy webhook field is actually official and does not need to be filled out. Its value was already used when creating outgoing webhooks on the UniTalk side.
Step 3. Integration with CRM
Step 3. Integration with CRM
In this settings block, you can select which entities should be created for different types of calls:
And separately define the Person responsible for each of these call types:
🟣 Received and Outgoing — the Person responsible is always the Line operator.
🟣 Missed — one of the following options can be selected:
Line operator — the person responsible is the operator on whose line the call was dropped (not answered).
Responsible for the base entity (if the number is known) — if the phone number already exists in the CRM, the person responsible will be the user assigned to the Contact or Lead (regardless of which phone number the client called).
Default person responsible — the person responsible will be the user specified in the Default responsible field at the bottom of the settings page (Step 5).
Specific user — you can directly select a specific employee who will be responsible for missed calls (separately for known and unknown numbers).
You can also specify the desired Source.
💡The available options for this field depend on the type of entity selected for creation based on the call.
☝🏻 For the activity, NO source is predefined.
You can add your own option. This means that your list can include not only standard sources but also those you have created yourself, for example, for a specific telephony service.
How to add the name of the telephony service as a source?
In Settings, go to the block of the entity for which you want to add your own option for the Source field.

Then edit the settings for this field.

Next, add (1) a row for the new value and give it a name (2), and then click Save (3).

After this, when filling out the Source field in the telephony settings, the newly created option will appear.
Step 4. Matching phone numbers
Step 4. Matching phone numbers
At Uspacy, you also need to specify a separate line for each responsible employee, which has already been created in UniTalk. First, click Add.
Next, in the Employees field, select a user from the list. Start typing a name to speed up the search for a colleague.
In the Extension number or line value field, specify the SIP line that was created in UniTalk and for which this user is responsible.
Save these settings by clicking on the check mark.
❗️If an incoming call in the telephony system is answered by an operator who is not matched to any Uspacy user, the system will automatically assign the default person responsible (if one is specified in the integration settings).
If the default person responsible is also not matched to a Uspacy user, then the Space owner will be assigned as the person responsible for the call.
This ensures that calls always have an assigned person responsible, even in non-standard situations.
Step 5. Assigning a default person responsible
Step 5. Assigning a default person responsible
Now it is possible to assign a person responsible for new entities created on the basis of the processing of missed calls.

💡 If you do not do this, then the Space owner will be considered the default person responsible.
UniTalk extension for Google Chrome
In order to call clients, you do not need to install additional third-party applications on your devices. Thanks to a special extension in Google Chrome, you can make and receive outgoing calls on any page of the browser, including your Uspacy Space.
Step 1. Installation
Step 1. Installation
You can find this extension in the Chrome Web Store. In the search bar, you need to start entering its name - UniTalk Web Dialer.
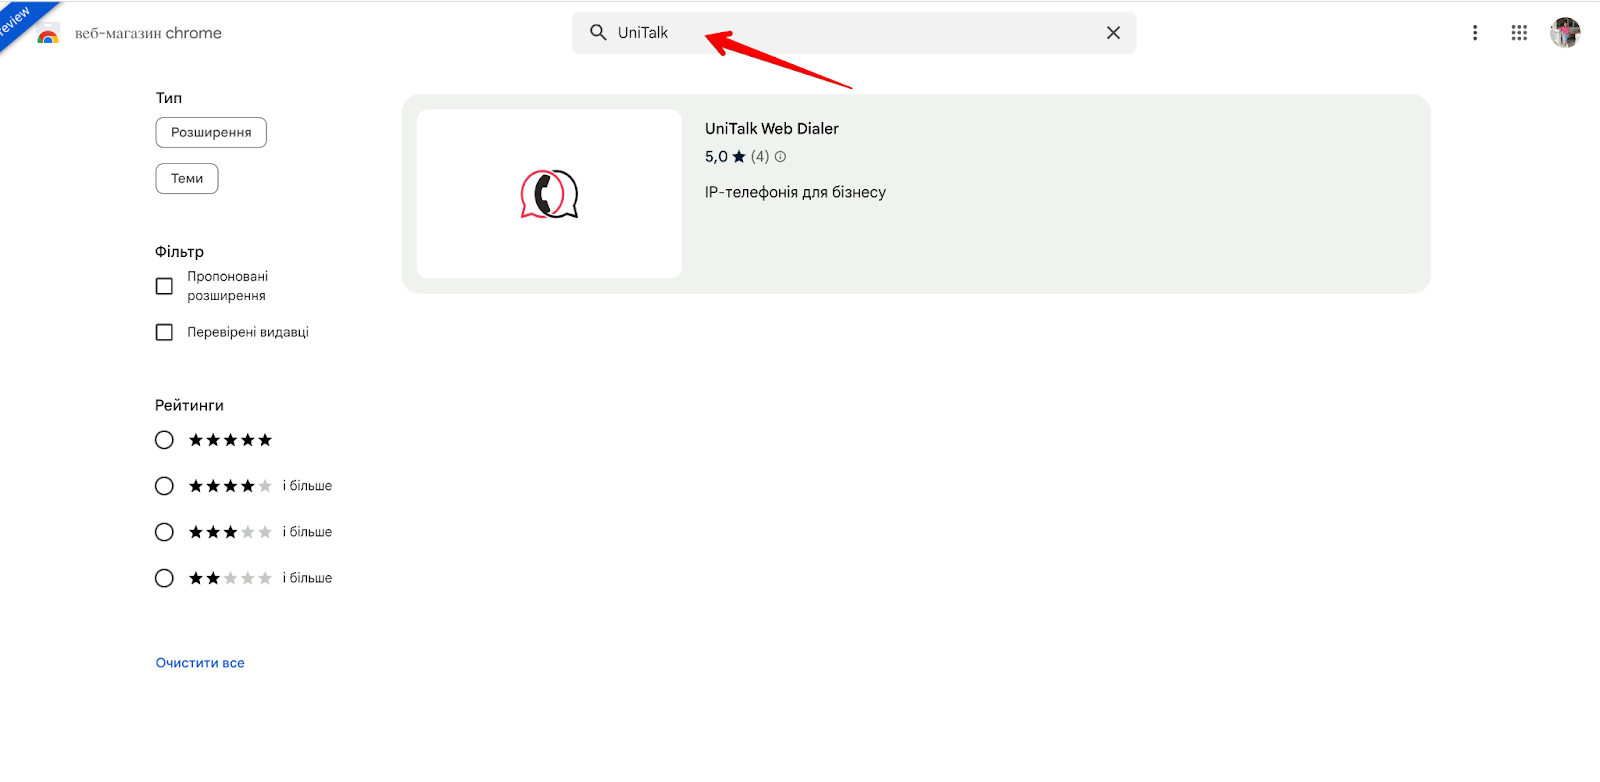
Or you can add it to Chrome by following the direct link HERE.
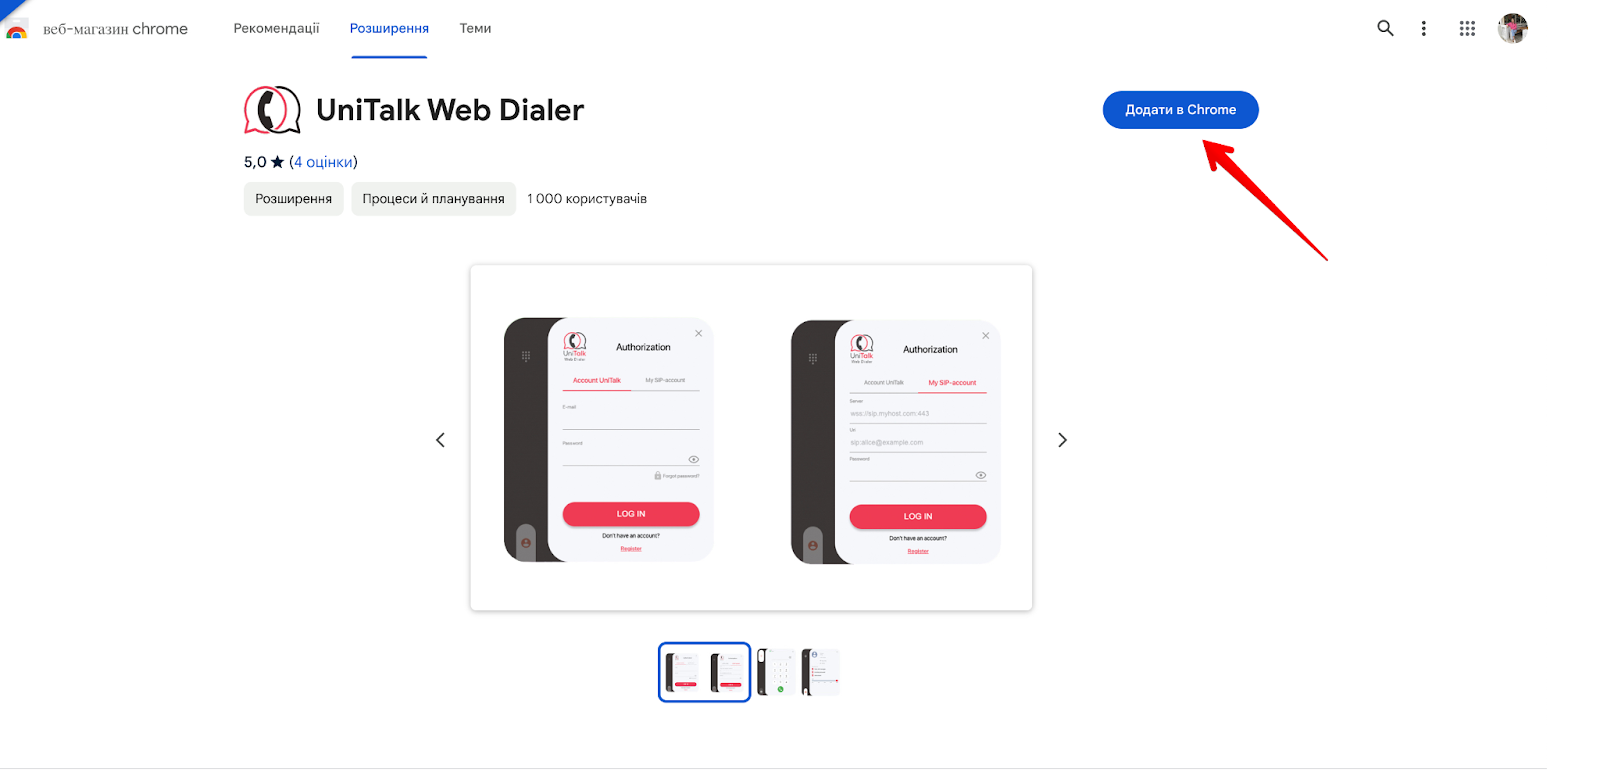
After installation, this extension will be active in your browser.
Step 2. Log in to UniTalk account
Step 2. Log in to UniTalk account
You need to enter the email address and the generated password that were used when matching the users responsible to the lines and click Login.
Work with telephony
After that, you can start working with UniTalk telephony directly at Uspacy – making or receiving calls from clients.

☎️ All calls (incoming, outgoing and missed) will be saved on the Call log page. Here you can process calls, for example, listen to recordings of conversations or go to the card of the related CRM entity.
💡It is available only on commercial plans.
On the call log page, you can immediately process calls, for example, listen to the recordings of conversations or go to the card of the related CRM entity.

🙌🏻 Please note that conversation recordings are usually added with a delay of 10-15 minutes. If the call was long, the delay may be a little longer.
Conversation records will be contained in the CRM card as well, in its right part, under the activity filter, where the history of interaction with the element is displayed.

Update settings
🟣 September 2024. It's possible to transfer information through UTM tags. To do this, just add the following part to the Ended call webhook:
"utmSource": "{{UTM_SOURCE}}",
"utmMedium": "{{UTM_MEDIUM}}",
"utmCampaign": "{{UTM_CAMPAIGN}}",
"utmTerm": "{{UTM_TERM}}",
"utmContent": "{{UTM_CONTENT}}",

🔍More details on settings and full JSON request body for Ended call webhook ➡️ Unitalk settings - Step 3 Outgoing webhooks - Ended call.
🟣 May 2025. Step 3. Integration with CRM – the ability to select which entities should be created for different types of calls.
If you have additional questions or you need to contact the support, send a request to this email [email protected]